What's new
Pinball info

Register a free account today to become a member! Once signed in, you'll be able to participate on this site by adding your own topics and posts, as well as connect with other members through your own private inbox!

In Progress Atari Space Riders (1978)

smarty-uk

Site Supporter
Joined
Sep 3, 2011
Messages
23
Location
Fleet, Hampshire
Alias
smarty
Atari Space Riders Pinball (1978)

Disclaimer: This is my 1st pin, so go easy if any of my terminology isn't quite right. :)

I'll attempt to document bringing this game back to life as I go.

I do own an Atari Video Pinball arcade so I've been a virtual pin guy up until now!

fullsizeoutput_19be.jpeg

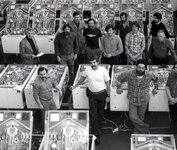
I purchased from the USA based on these photo's, sold as complete but not working, it was imported to the UK in container with loads of video arcades.

fullsizeoutput_18ff.jpeg

IMG_3298.JPG

IMG_3299.JPG

IMG_3301.JPG

So it arrived in the UK and was dropped off to me by Martin the deliveryman.

IMG_2705.JPG

The bolts for the legs had gone missing somewhere along its journey so for now it had to sit on the floor.

IMG_2718.JPG

Upon lifting the play field it was nice to find an original bag with the manual, wiring diagram and game instruction and credit info cards.

IMG_2707.JPG

At this point I lifted the playfield and decided to check all the fuses in the game, surprisingly all were the correct value and still intact. Like the Atari video games, the input power supply can usually be changed by rewiring on of the Molex plugs attached to the power supply, its used to change the routing of the mains supply through the primary windings of the main PSU transformer. I used the wiring diagram to re-pin the connector for 230v AC input.

B110D3B4-2E4D-4ADD-A6B3-2B72EE701F51.jpeg

IMG_2750.JPG

Next up I removed the CPU PCB to give it a once over and look for any signs or failure or damage, on these Atari games, the Solenoid and lamp control circuits are part of the same PCB. Straight away I could see there was an Operator bodge in place with turned out to be a control line for one of the lamps. (The thick wire between the two connectors with white cables)

968D986B-773C-420B-B8E1-8385448617E2.jpeg

The wire from the main harness has broken an instead of fixing it properly a wire was soldered to the PCB and them linked to the broken end of the loom. The connector pin was soldered back together and then the wire removed and the trace that had been used repaired.

0C3990CE-F3FF-4312-ABE6-F459C243859E.jpeg

At this point I re-fitted the main PCB, for luck I removed and reconnected every connector I could see in the cab and decided it was time to plug it in and see what happened...

To be continued...
 
Last edited:
Ah brings back memories, was also my first pin but some 30 years ago. I bought it for £30 with a broken flipper wire, that's where it went wrong for me! I resoldered the wire with the pin on! And solder dropped on to the pcb and killed half the switch matrix! with my limited skills at that time I never got it working! Playfield was worn down to the wood in the middle. I sold it on but sore someone on here now has it.

Looks like you have a good example to start with, good luck with it.
 
Atari Space Riders Pinball (1978) - Part 2

So I applied power and the pin sprung into life, well not fully working but there was no magic smoke at this point so I'll mark this as a successful power up!!

IMG_2764.JPG

Even thought its a bad photo you can see there are some lights on the playfield, I triggered the coin switch and the the game would play, albeit looking a bit dim, the scores were also messed up and not showing correctly, so these would be the next two jobs to look at.

The issue with the lights was the first thing I set about looking at, after reading the manual and looking at the schematics, I understood that the Aux PCB had transistors that combined with some logic signals form the main CPU PCB controlled the lights, using the wiring diagram I worked out which lamps were not working and referenced that the transistors on the AUX PCB, using a logic probe I could see there was only one transistor working correctly, the outputs of the three faulty ones were being held high. Whereas the working one was pulsing a digital signal.

I ordered four transistors and when they arrived set about replacing them.

Transistors removed, clearly they generate a lot of heat!, the copper traces they connect to were in a very poor state.

IMG_2908.JPG

I used some copper adhesive tape to make some replacement tracks, these were then tinned

IMG_2909.JPG

I then tinned the copper making it ready for the new transistors.

IMG_2913.JPG

Transistors soldered in place, some original capacitors were also tidied up and refitted.

IMG_2916.JPG

New transistors installed.

IMG_2914.JPG

After refitting the PCB the light display worked fine, with attract mode cycling through different patterns of lights. The game was also a lot brighter to play and further test. :)

IMG_3236.JPG

Score display fix coming real soon!
 
Last edited:
Ronnie, DRD thanks for the comments :)

Atari Space Riders Pinball (1978) - Part 3

Time to sort the score displays out. I was expecting this to be a difficult fix and that was proved right, I spent a good amount hours getting to the bottom of this fault, not being someone who just shotguns a stack of parts to fix a problem, I like to know why something is faulty and find that cause.

Atari describes the score panel as a Gas Discharge Display. They are a glass based vacuum tube which are made up of seven segment displays. Using 180 volts DC, gas (likely Neon) the segments are illuminated, if you take a look over google or Youtube there is little info on the panels Atari used most of the content is about how they can go faulty.

With my panel the Player 1 and player 3 score digits were either missing or randomly flashing.

When the game boots all segments should illuminate and the 1,2,3,4 player up selections should scroll. Here's what mine looked like. player 1 and three score was missing or corrupt, 1st up didn't light up and 3rd up was randomly always flickering.

IMG_2769.JPG

The 1st thing to do was remove the plastics and check that the glass panel was correctly aligned with the sixty or so pins that connect to the pins of the circuit board. Unlike other photos and videos I've seen, mine looked complete and I would say had never been touched, there were metal clips with silicon holding them in place.

Once screws were removed and the clips released I removed the panel:

As you can see below the copper contacts didn't look healthy, checking continuity on the pins some had broken connections. Again out came the self adhesive copper tape and I re-pinned all the connections.

fullsizeoutput_19f7.jpeg
An hour later I had cut a lot of tape and had it nicely lined up, continuity was now good across all connections.

IMG_2957.JPG
At this point I removed the score PCB which is mounted in a plastic case that connects to the display itself. I tested and measured most of the components (resistors, diodes and transistors) All of those were good, I found a few suspect solder joints so reflowed them and put the bits back together.


As always happens when you put load of effort in, nothing was fixed and the same fault was present with the scores... After a bit of sulking and some more thinking I decided the fault could now only be the display itself or the Driver IC's for the segment displays. I took the assembly apart and removed the PCB, I removed the four driver IC's and fitted sockets, I'd marked the IC's and swapped their locations to see if the fault moved.

As can be seen below, with IC's I believed to be good moved around, player one and two lit up and displayed correctly.

IMG_2960.JPG

Off to eBay to source some replacement IC's, a few days later I had a package with four new seven segment drivers. Once fitted, all the scores displayed correctly and I had a quick four player game to confirm they were working correctly.

IMG_3239.JPG

At power on, all segments light and the player up number scrolls, this was now all good.

With hindsight I spent more time on this that I needed to, I could have shotgunned the IC's once I'd confirmed the voltages were correct. The work I've done repairing the copper contacts should now give a lifetimes worth of play without issue! Who am I kidding when trying t o keep a 40 year old machine running...

Next up is the play field; time to remove all the plastics, metalwork and anything that can be removed from the top. I plan to give it a good clean, fit new rubbers all round and make good anything that needs attention.

fullsizeoutput_1900.jpeg

More photos and less waffle next time. ;)
 
This is a really welcome thread. Delighted that you managed to sort the displays without incurring major cost. That pf looks like it should come up ok.

There is virtually nothing on this site about Atari pinball machines. Atari brightened the lives of millions of people. Be that the 2600, or the iconic vector graphics games, the best video arcade game of its era IMHO (Star Wars) or the later colour tv games. Atari in the 1970s and 1980s usually meant something special - unique controllers, fantastic cabinets, really fast gameplay, great sounds ...

Please keep it coming.
 
Atari Space Riders Pinball (1978) - Part 4

Pushing on with this now, with plenty of photos. With the electronics and mechanical parts all seeming to be working OK, it was time to give the play field and all the parts a good clean. Time to strip it down and get rid of all that grime.

IMG_3245.JPG
IMG_3246.JPG
IMG_3247.JPG
IMG_3248.JPG
IMG_3249.JPG
IMG_3251.JPG
IMG_3254.JPG
IMG_3258.JPG
IMG_3259.JPG

The worst part of the play field was by both pop bumpers.
IMG_3261.JPG
IMG_3262.JPG
IMG_3263.JPG
IMG_3266.JPG

So this is where all the play field art was hiding!
IMG_3268.JPG

Putting the kitchen sink to good use!
IMG_3269.JPG
IMG_3270.JPG
IMG_3271.JPG
IMG_3273.JPG

IMG_3274.JPG

It was a great day to dry all the parts outside.
IMG_3276.JPG

I ordered a selection of cleaning products and some new lamps, balls and rubbers from Pinball Heaven. After giving everything a good clean I used some Novus on the plastics and Milwax on the playfield. The metalwork had a quick polish too. At this point I started reassembling it all using loads of photos I'd taken fir reference.

IMG_3277.JPG
IMG_3279.JPG
IMG_3280.JPG
IMG_3283.JPG
IMG_3284.JPG
IMG_3285.JPG
IMG_3286.JPG
IMG_3287.JPG
IMG_3288.JPG
IMG_3290.JPG

IMG_3291.JPG

At this point I was all set to put the legs back on, move the game in to place and invite some mates round for a game or two, what could go wrong? Being an Atari pin, my work was not yet complete...
 
Really enjoying reading this thread. You make it look soooooooo easy. Carry on. No plans to touch up the playfield then?
 
Hi. I think I've shortened the process of writing this up so far, believe me I've spent good chunks of time working out what needs doing and how best to go about it. I spent countless evening reading the ops manual and staring at the schematics trying to learn what makes this game tick.

My initial plan is to get game clean and playable, from there I can look at improving small bits ad-hoc, the game is over forty years old and I'm quite happy with its battle scars from an external point of view, but there will be a list I rattle through over time.

Longer term will definitely include making improvements to the playfield, but being totally honest, this is something I need to investigate and ask the forum for help with I'm not sure where to start or what the best action is for the problems I have with it. The flippers and one of the other solenoid parts need rebuilding so that's on the list too. Even though the game is running 240Vac the backbox lights are running at 110Vac so thats on the list too to make them more usable going forward and the fact I've only got four of the five bulbs inside working.

Cheers, Mart.
 
Hi Mart, cracking work mate, I think the wear round the pop bumpers will get worse with use! If it were me I might consider cutting vinyl purple circles to match in? rather than try and touch it in. I suppose it depends how far you want to go with it. The one I had years ago was worn down to the wood right down the middle so in comparison your looks great.
 
Enjoying this thread too, thanks for posting.

Fyi there is a section in Clays repair guide on pf touchup including circles around pops, it's not for the faint hearted and any touchups need protecting http://www.pinrepair.com/restore/index2.htm#pf1

Personally, I'd consider making a full pf protector to preserve and shine the original art that's left but I kinda like machines that show their battle scars :thumbs:
 
Cool photo. :)


Atari Space Riders Pinball (1978) - Part 5​


So the game was up and running and looking great, a bunch of my arcade buddies were coming over the next day so I thought it was best to change the replay settings as they were currently set to win extra credits at certain score points; there was no point in having that as an incentive considering we weren't dropping coins to play games, I though I'd change it to add-a-ball at certain scores, I flicked the dip switches on the CPU board and thought nothing of it. Roll on the next day, I turn the game on when my mates arrive and during the second or third game the game froze, all the play field lamps were on with nothing else going on, no coin input or anything worked. I re-powered the game but still it was in this frozen state. Hum ho, no more pinball games for my mates, at least one of them had got a game in! I was miffed at what had happened but that's life with 40 year old machine.

A few days later I wanted to find out what had gone on it was only then i realised that last thing I did was change the dip switch settings. I moved them back to how it originally was and boom, the game started working again, ok that was an easy fix but I wanted to have the game set differently so needed to find out what was wrong.

I played games for a few hours now it was 'working' again but did notice the game rules weren't working correctly and Tilt would randomly be triggered ending a ball for no reason.

Atari arcade games usually have good tech manuals which give descriptions of the different areas of the game circuits, the Pinball ops manual is no different, because it seemed related to the dip switch settings, I read up on the switch reading circuit. All the switches are connected to one side of multiple 74145 IC's, From memory (its been a while since I fixed the problem!) the switch states constantly being read and their values stored in memory. Long story cut short, I had some failing 145's, Initially I removed and tested the 145's that were connected to the dip switches, sure enough they tested as fault in my IC tester. because these had failed I decided to remove the remaining one Six in total I think and test those, a few more came back with errors so I put sockets in and fitted replacement IC's. To date I've not had issues with switches being falsely triggered or the game locking up.

Fast forward most of 2020 and the game has been regularly played, recently the display for credit and ball number stated intermittently working, something new to look at when I have the space to remove the glass from the game.

...Boring post with no photos, I'll make sure I add a few in the next post, when I fix the score display issue.

Cheers.
 
Back
Top Bottom