What's new
Pinball info

Register a free account today to become a member! Once signed in, you'll be able to participate on this site by adding your own topics and posts, as well as connect with other members through your own private inbox!

Wanted AfterGlow GI

Yes, I didn't manage to open the document yesterday. Sorry for the BOM errors, I just didn't do this properly.

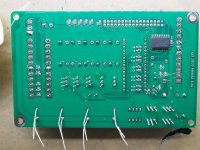
The 74LS374 I was using seems to be slightly wider and fits the footprint nicely.
This is the trimmer I was using.

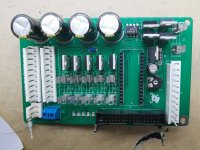
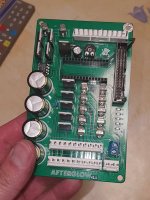
C4 should be ok, I believe the fix was done on the bottom side of the PCB, but I can check later today.
 
@caponian,

Thanks. Do you have the exact 74LS374 brand and part number you used ?

I'll ask to modify the trimmer

Any pointer for the other BOM errors (especially the big C4 capacitor) ? Did you have a chance to check C4 footprint ?
 
Exact 74LS374 is linked in the post above. I can check again on the C4 placement after work.
 
On the IC, indeed I've been basing my BOM according to @stumblor BOM, which would be OK for manual assembly but is causing problem for PCBWay.
I would appreciate a pointer reference for the LEDs (although given the space that should be fine) and C4

I'll ask to see if they can replace these components.
 
@caponian , thanks for that

So to summarize where I stand:
- U1: replacement available (I checked your part, indeed it is slightly different and it's wider)
- 10k trimmer: replacement available as well
- C4: need a replacement part. The description in the BOM states "C_Rect_L7.0mm_W3.5mm_P5.00mm", I used @stumblor BOM without checking it's size, I would welcome a pointer to a replacement part
- Caps: error on the component, selected component is 1206 in size, pad is 0805. I can probably find an equivalent on Mouser (pointer would be welcome)
- Diode: error on the component, selected component is bigger. Note on a discrepancy: PCBWay states the footprint is 1206, the BOM states it is 0805. Can you please confirm which is correct ?
- All resistances: components selected are 1205, pad is 0805

I really should have paid more attention to the component size, I incorrectly assumed they were correct from the beginning.
 
My apologies @Ashram56 I hope it wasn't my BOM that caused all these issues! As you said earlier what is okay for manual build is not necessarily okay for automated. :-/
 
As the BOM on github states all SMD parts are 0805. However, I have used hand soldering footprints, which are slightly larger than the one for manufacturing.
 
My apologies @Ashram56 I hope it wasn't my BOM that caused all these issues! As you said earlier what is okay for manual build is not necessarily okay for automated. :-/
No worries, I should have paid more attention. I'll replace the components in the BOM with correct versions.
Just missing C4 if you can find a reference link

Regards
 
@stumblor, @caponian,

Just received the pictures of the sample assembly, attached below.
They have a question on C4, they are concerned about the placement, but I'm not sure I understand why

Diodes seem in the correct orientation, but I would welcome a double check

Regards
 

Attachments

  • IMG_20210129_101103.jpg
    IMG_20210129_101103.jpg
    140 KB · Views: 19
  • IMG_20210129_101055.jpg
    IMG_20210129_101055.jpg
    150.2 KB · Views: 20
C4 is fine - it doesn't have polarity so not sure what the issue could be. Have they elaborated?

Will check diodes in a bit.
 
on C4 I think the confusion comes from a picture they had in my Excel spreadsheet, which they actually generated themselves, from the backside, and they think it's coming from me...

[EDIT] ah I know where it's coming from, I had sent pictures from @caponian to help them build the board, and C4 was located underside because there was a short in an earlier design
 
Last edited:
Received the boards. Hopefully no error, will test tomorrow.

@caponian and @stumblor, I would welcome a close up of your ribbon cable so that I don't mess pinout

Also I assume I need to cut pin 4 on j3 and j4?
 

Attachments

  • 20210214_181458.jpg
    20210214_181458.jpg
    110.5 KB · Views: 13
A few recommendations to @caponian on the silkscreen: would be good to add, just like for Afterglow, a small triangle pointing to the pins that have to be removed on J6, J4, J5 and J3.

As it stands, based on schematics:
J6 = need to remove pin 9 and pin 1 (pin 1 is the square solder pad, close to the fuse holder)
J5 = need to remove pin 2
J4 and J3 = need to remove pin 4

Also recommended to add Amp level for fuse F6 (10A according to schematics). Other fuses have a 2A silkscreen

Not strictly necessary, since the info can be extracted from the schematics, but would be useful nonetheless.

@stumblor, absolutely, rainbow cable it is (and that's what I have :))
 
And of course, cable is the main issue. I can't pull the cables enough, so I need to build extension cables (I incorrectly assumed it was the proper length).

So... @caponian, I see in your pictures folder on your github that you have used this kind of "Z" adaptor to build these cables, but I can't find a reference, so a pointer would be welcome

Cheers
 
You can also make them buy soldering two headers together in opposite directions but it doesn't look the best.
 
Looks like these parts are manufactured by a company called "ITW Pancon", which seems to be owned by Pancon in Germany
But they obviously forgot to update their website to another language than german :)

[EDIT] I take it back, it was manufactured by Pancon Corporation in the US, who has closed business in 2019... That's going to be a problem...
[EDIT2] So I found an alternate solution, but it's not that much cheaper

TE carries this type of connector:
https://www.te.com/usa-en/product-4-641435-2.html

Various sizes available: 2,3,6, 4,9,12,15,24

Oddly enough... Not 10 nor 11 !
 
Last edited:
Back
Top Bottom