Ok, here we go again…
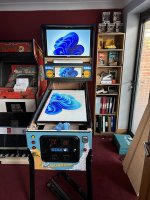
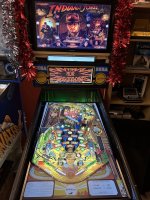
After my successful 4k VP build of 3 years ago (couldn’t believe it was that long ago when I checked my camera roll - but a VP project during lockdown makes sense), I am going to do the whole thing again but this time using someone else’s HD build based on a Sega Baywatch as the starting point.
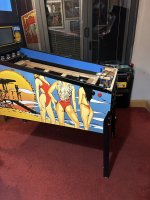
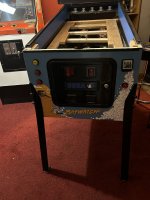
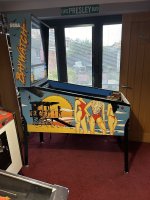
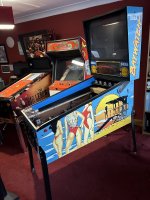
Picked up cabinet Sunday minus the playfield screen which I didn’t need as wasn’t 4K so agreed with previous owner he could keep that for a reduction in purchase price.
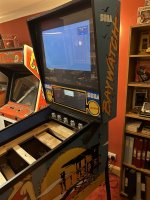
Had a first proper look at it last night so I could start to make up my shopping list.
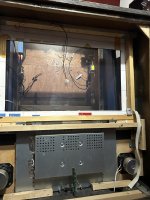
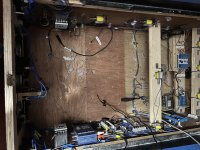
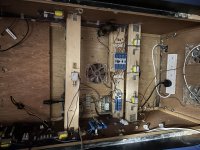
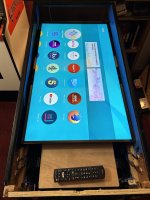
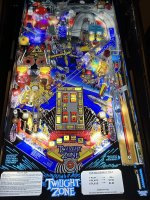
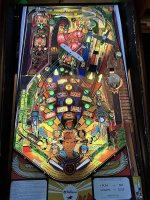
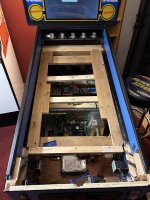
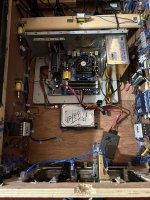
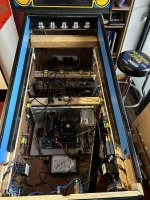
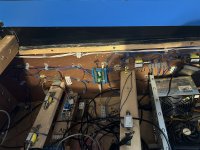
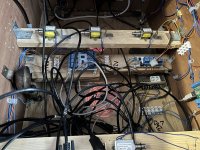
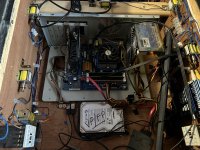
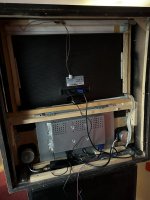
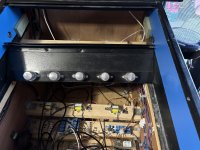
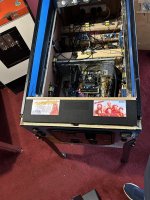
Got plenty going on “under the hood” for me to get my head around. Although on face of it seems to have a lot of wiring and cables, I think I can figure out what’s going on down there.
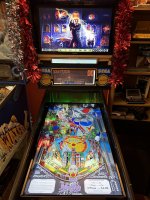
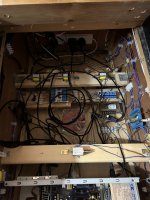
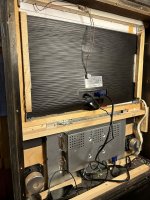
The build I did back in 2020 used an KL25Z as the interface and accelerometer - this appears to be using an I-pac, which I am presuming does not have the nudge functionality so might swap that out.
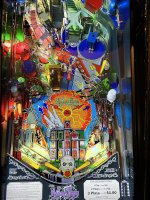
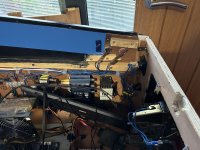
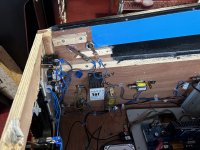
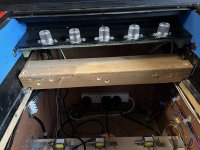
Main thing that enticed me to buy was the solenoids fitted in there. My previous build did not have that feature. Something new for me to figure out. They all appear to be 12v solenoids connected to USB relay boards (again something for me to figure out!) though there is one "regular" pin solenoid on left hand side of cabinet towards front so not quite sure what that is (there's only one on left hand side not right so figure not flipper solenoids). What is a little confusing is the solenoids are labelled up as 12v but there's a switching power supply in the cab that is putting out 24V DC and the wires from that are running to those big "block things" one at each side of cab which I have absolutely no idea what they are - maybe some kind of "step down" to make 24v in to 12v? There is 24V and 12V written in Sharpie at various points in the cabinet.
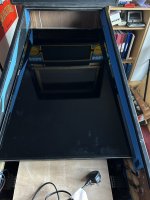
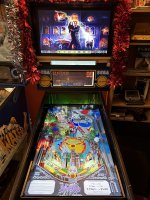
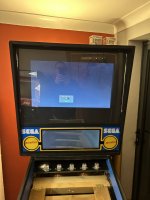
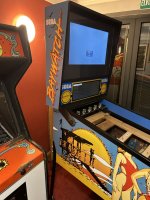
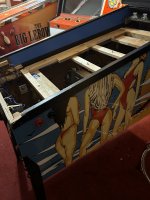
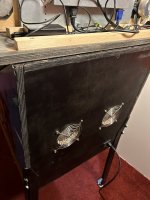
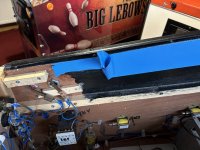
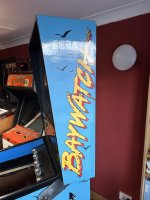
On the cabinet, although it is decaled as a Sega Baywatch it looks like some kind of scratch build as it's done in plywood with wooden supports at the corners, not like anything I've seen before in a WMS or Stern.
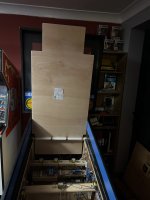
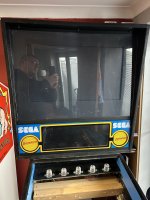
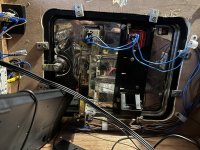
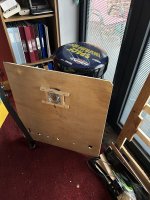
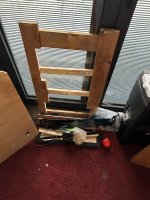
Anyways, all I did last night was take out the hinged frame that the TV had been mounted to and start to make shopping list.
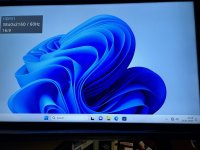
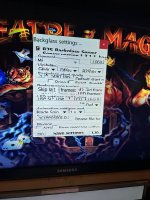
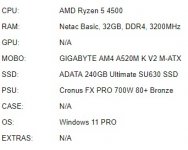
Old PC under specced for 4k so have ordered new build from local pc supplier. Spec as per photo.
Put new graphics card on list and then found a Nvidia Geforce GTX 1070 8gb GDDR2 in local CEX on way to parents’ house last night. Thought that was going to be harder!
In same CEX found 27” Samsung s27E330H for £69 which I will use for back-glass screen. One currently installed is only 24” and there’s way too much black cardboard bezel for my liking
Now comes the hard part of sourcing UHD TV which will fit cab. I remember this was a pain last time. From memory 42” and 43” screens don’t fit (shame as there seem to be loads of them about) and I ended up buying a 40” Panasonic TX-40GX820B. Of course 3 years on and the only one of those I can find is one on EBay but that’s in Sheerness and is collection only and way too far for me to travel. There was actually one on FB Marketplace being sold by someone local but I missed out on that by a day .
.
Will post a log and photos. First bunch of photos below.
After my successful 4k VP build of 3 years ago (couldn’t believe it was that long ago when I checked my camera roll - but a VP project during lockdown makes sense), I am going to do the whole thing again but this time using someone else’s HD build based on a Sega Baywatch as the starting point.
Picked up cabinet Sunday minus the playfield screen which I didn’t need as wasn’t 4K so agreed with previous owner he could keep that for a reduction in purchase price.
Had a first proper look at it last night so I could start to make up my shopping list.
Got plenty going on “under the hood” for me to get my head around. Although on face of it seems to have a lot of wiring and cables, I think I can figure out what’s going on down there.
The build I did back in 2020 used an KL25Z as the interface and accelerometer - this appears to be using an I-pac, which I am presuming does not have the nudge functionality so might swap that out.
Main thing that enticed me to buy was the solenoids fitted in there. My previous build did not have that feature. Something new for me to figure out. They all appear to be 12v solenoids connected to USB relay boards (again something for me to figure out!) though there is one "regular" pin solenoid on left hand side of cabinet towards front so not quite sure what that is (there's only one on left hand side not right so figure not flipper solenoids). What is a little confusing is the solenoids are labelled up as 12v but there's a switching power supply in the cab that is putting out 24V DC and the wires from that are running to those big "block things" one at each side of cab which I have absolutely no idea what they are - maybe some kind of "step down" to make 24v in to 12v? There is 24V and 12V written in Sharpie at various points in the cabinet.
On the cabinet, although it is decaled as a Sega Baywatch it looks like some kind of scratch build as it's done in plywood with wooden supports at the corners, not like anything I've seen before in a WMS or Stern.
Anyways, all I did last night was take out the hinged frame that the TV had been mounted to and start to make shopping list.
Old PC under specced for 4k so have ordered new build from local pc supplier. Spec as per photo.
Put new graphics card on list and then found a Nvidia Geforce GTX 1070 8gb GDDR2 in local CEX on way to parents’ house last night. Thought that was going to be harder!
In same CEX found 27” Samsung s27E330H for £69 which I will use for back-glass screen. One currently installed is only 24” and there’s way too much black cardboard bezel for my liking
Now comes the hard part of sourcing UHD TV which will fit cab. I remember this was a pain last time. From memory 42” and 43” screens don’t fit (shame as there seem to be loads of them about) and I ended up buying a 40” Panasonic TX-40GX820B. Of course 3 years on and the only one of those I can find is one on EBay but that’s in Sheerness and is collection only and way too far for me to travel. There was actually one on FB Marketplace being sold by someone local but I missed out on that by a day
.Will post a log and photos. First bunch of photos below.
Attachments
-
 IMG_1453.jpeg141.6 KB · Views: 63
 -
 IMG_1454.jpeg125.6 KB · Views: 40
 -
 IMG_1455.jpeg155.9 KB · Views: 38
 -
 IMG_1456.jpeg79.3 KB · Views: 41
 -
 IMG_1457.jpeg118.7 KB · Views: 50
 -
 IMG_1458.jpeg137.5 KB · Views: 49
 -
 IMG_1459.jpeg133.4 KB · Views: 47
 -
 IMG_1460.jpeg107.8 KB · Views: 42
 -
 IMG_1461.jpeg130 KB · Views: 41
 -
 IMG_1462.jpeg168.3 KB · Views: 41
 -
 IMG_1463.jpeg107.1 KB · Views: 38
 -
 IMG_1473.jpeg175.6 KB · Views: 40
 -
 IMG_1474.jpeg139.6 KB · Views: 38
 -
 IMG_1475.jpeg109.5 KB · Views: 40
 -
 IMG_1476.jpeg182.6 KB · Views: 34
 -
 IMG_1477.jpeg190 KB · Views: 33
 -
 IMG_1478.jpeg180.8 KB · Views: 32
 -
 IMG_1479.jpeg151 KB · Views: 28
 -
 IMG_1480.jpeg236 KB · Views: 28
 -
 IMG_1481.jpeg206.4 KB · Views: 27
 -
 IMG_1482.jpeg160.7 KB · Views: 30
 -
 IMG_1483.jpeg143.4 KB · Views: 30
 -
 IMG_1484.jpeg206.8 KB · Views: 26
 -
 IMG_1485.jpeg101.3 KB · Views: 23
 -
 IMG_1486.jpeg161.2 KB · Views: 20
 -
 IMG_1487.jpeg172.3 KB · Views: 18
 -
 IMG_1488.jpeg146.1 KB · Views: 16
 -
 IMG_1489.jpeg148.2 KB · Views: 19
 -
 IMG_1490.jpeg155.3 KB · Views: 22
 -
 IMG_1491.jpeg100.8 KB · Views: 41
 -
 IMG_1492.jpeg43.7 KB · Views: 60
Last edited: