What's new
Pinball info

Register a free account today to become a member! Once signed in, you'll be able to participate on this site by adding your own topics and posts, as well as connect with other members through your own private inbox!

In Progress TSPP restore

ChriX

Site Supporter
Joined
Aug 29, 2011
Messages
140
Location
Cornwall
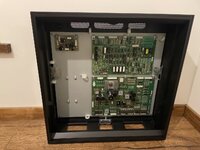
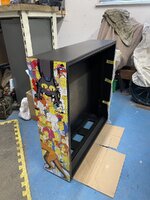
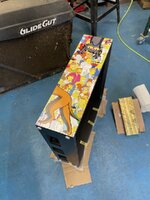
It's been a day or two since I last worked on a machine - last one was my Hook in 2018. In fact, in that thread you can see this TSPP still in one piece shortly before I dismantled it. Anyway, long story short I didn't have a job in 2018 and took it to bits on the basis I'd have time to work on it, and then of course I ended up taking a new job offer literally the week after, and it's basically been semi-dismantled since then. It's constantly bugged me since it's my favourite game and the only one I haven't played in 5 years 😅

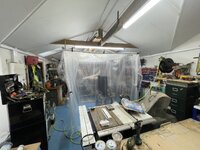
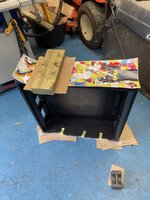
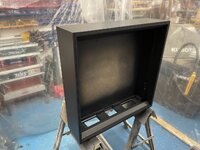
I'm making this thread on here as a bit of accountability to myself to keep the project moving. Here are some starting photos from 2018, then I'll follow up with something a bit more recent later!

IMG_1206_Big.jpeg

MLKI3420_Big.JPG

IMG_1224_Big.jpeg

IMG_1225_Big.jpeg
 
Couple more photos. I've sanded the whole head down, filled and sanded again, primed and sanded again and just shot it with a top coat. Hopefully it will dull down to satin after it dries as it's a bit glossy at the moment. I'm going to focus on getting the decals on and getting the head back together before even touching the rest of it as I've already got too many parts lying around.

IMG_2045_Big.jpeg

IMG_2099_Big.jpeg

IMG_2105_Big.jpeg
 
Looking forward to watching this come Along! I started stripping my Simpsons just over a year ago now and haven’t touched it since 😩 although I’ve still been collecting parts for it 😆
 
Haha @Andy.S there must be something about this game - I started collecting parts in 2016 and stripped it in 2018 and here we are 😅
 
A bit more progress here in the past week.

I ended up having to rig up a spray booth in the shed - I had been spraying outside but the weather put an end to that. That seemed to get me some decent results for the top coat, so then on to my first ever cabinet decal install. I was pretty happy with the outcome, the first side wasn't perfect as I got a couple of bubbles and you can see where I've worked them out, but the second side is spot on. A win for hands-on experience I guess.

Next I finally got to put stuff back together for the first time in all these years. Installed fresh ground braid, cleaned up the boards and mounted them on the clean backboard. I realised back when I took it apart I used the peroxide bleach method on the cable management loops so they all look new, a nice bonus! It's looking amazing and a huge boost for motivation to keep going now. 😁

Also migrated it into the house where the machine is going to go - I'm building it in my (upstairs) office so it's going to be stuck there for a while.
 

Attachments

  • IMG_2178_Larger.jpeg
    IMG_2178_Larger.jpeg
    163.2 KB · Views: 46
  • IMG_2165_Larger.jpeg
    IMG_2165_Larger.jpeg
    138.6 KB · Views: 54
  • IMG_2164_Larger.jpeg
    IMG_2164_Larger.jpeg
    128.3 KB · Views: 54
  • IMG_2134_Larger.jpeg
    IMG_2134_Larger.jpeg
    173.4 KB · Views: 51
  • IMG_2163_Larger.jpeg
    IMG_2163_Larger.jpeg
    132 KB · Views: 47
  • IMG_2139_Larger.jpeg
    IMG_2139_Larger.jpeg
    158.7 KB · Views: 47
Last edited:
I'm loving the Dexter murder room plastic you've got going on. 😀
 
Back
Top Bottom