What's new

In Progress TOTAN Make-over

Steve

Registered
Joined
Jul 21, 2011
Messages
774
Location
Maldon,Essex
Today I've started the job of 'freshening-up' my Tales of the Arabian Nights. It's in quite good original condition, with a nice playfield and appears to have had an easy life (The guy I bought it from had it for years).
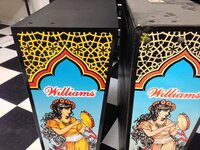
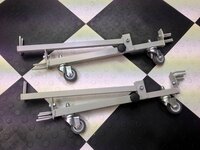
I'm not doing a cabinet re-decal as the originals are in excellent condition with hardly any fade and no damage whatsoever, but I'm swapping out the back box for a restored one as it has had a bad knock and been badly repaired (see pic). While I've got it apart I'm going to replace all the metalwork with brass finished parts as I think the theme suits this look. First step was to move it so I can work all the way round, using my trusty 'Flipper Boy', bought from a guy on the German forum. They are brilliant for shifting a pin on your own.
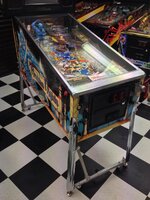
IMG_2268.jpg
 
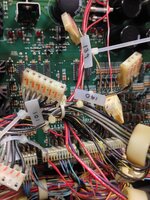
I use these cable ties for marking the wiring, makes it easy to put back and doesn't leave any writing on the connectors.

IMG_2280.jpg
 
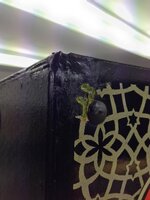
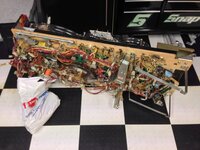
Here's the old back box showing the awful bodge someone has done, and the replacement.

IMG_2270.jpg IMG_2283.jpg
 
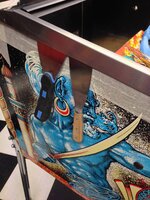
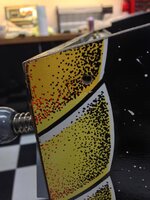
I'm replacing the side rails and this is the first time I've had to be careful getting the old ones off. (I'm keeping the original cabinet art). I tried Andy N's idea of a sharp scraper and it worked a treat with no damage!

IMG_2284.jpg IMG_2286.jpg
 
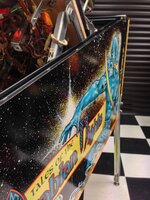
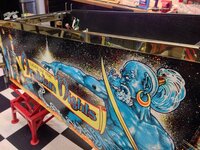
There is very little cab fade, as can be seen in this shot. (The original colour is at the top where the side rail would be).

IMG_2287.jpg
 
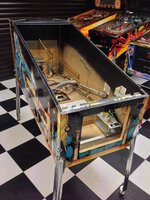
Playfield is now out. Anyone worried about doing this, shouldn't. It's so easy and takes 20 minutes (most of that is labeling and pulling all the connectors).

IMG_2290.jpg IMG_2289.jpg
 
Nice tip about getting side rails off - another job on my todo list.

Also, I love the black and white tiles in your games room. Very retro and cool!
 
That is not a games room, that is what my heaven looks like. ;)
I am pleased you are leaving the cab, it looks so good and the fade is so little. I like the way you ditch the playfield like that.
Thanks for the tips and pictures, it inspires and motivates me. Not long until I will be calling you for tips. ;)
 
I'd like to know more about this ' flipper boy ' pin mover, I can't quite make out what's going on there in the photo. I usually use he crawling around on all fours under the pin method o_O
 
I'd like to know more about this ' flipper boy ' pin mover, I can't quite make out what's going on there in the photo. I usually use he crawling around on all fours under the pin method o_O

Yeah a terrible name, but they are really good. You just slide them under each leg, lift and secure the handle and your'e off. The machine glides around on small castors and you can position where you want.

IMG_2293.jpg
 
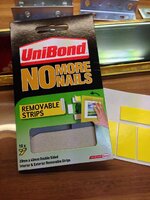
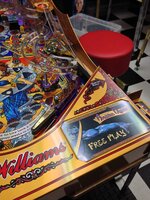
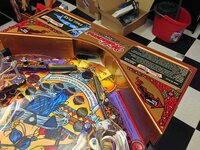
Fitted the brass side rails, they look really good. After the job of removing the old ones (in which they got damaged during the process) I decided I wasn't going to use the normal 'impossible to remove' factory stuff as there's no need for it to be this strong for home use. Instead i used a removable pad. They have gone on rock-hard but can be peeled off easily in the future.
I also figure that if I don't like the brass finish I can easily swap them without damaging the rails or side decals.

IMG_2295.jpg IMG_2294.jpg
 
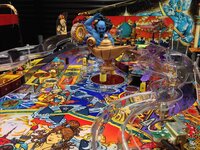
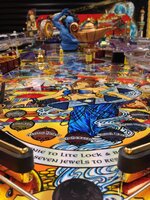
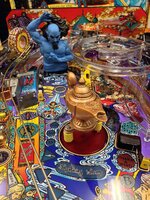
Been putting the playfield back together over the last few evenings. I've replaced the plastics, rubbers, ramps, posts, flippers etc., and metalwork has been tumbled.

I didn't do a full strip-down as it was quite clean and I couldn't be ****d, but it's clean and looks nice. I'm impressed with the look of the playfield protector, but time will tell if it works or not.

IMG_2379.jpg IMG_2383.jpg IMG_2384.jpg
 
I'm replacing the side rails and this is the first time I've had to be careful getting the old ones off. (I'm keeping the original cabinet art). I tried Andy N's idea of a sharp scraper and it worked a treat with no damage!

I don't supposed this is documented anywhere? It looks like you're just nudging the rail upwards with the tips of those scrapers... but maybe there's more to it...?
 
Those scrapers have been pushed right up to the top of the side rail, effectively cutting the seal between the double-sided foam tape.

I found the best technique is to:
  • Push the first scraper under the rail and force it upwards until it hits the top of the side rail
  • Gently pry the side rail away from the cabinet, working a few inches at a time
  • Push the next scraper in and repeat the process all the way down the side rail
  • Once half of the side rail is free, lever it away from the cabinet and it will break free
 
Playfield is ready to go back in now, which should be tomorrow. I've had the apron and several other parts painted in an antique gold metallic with clear coat, I can't make my mind up if it works or not?

I'll live with it for a bit and see as I'm not sure the paint will stand up to the abuse from the balls.

IMG_2397.jpg IMG_2398.jpg IMG_2400.jpg
 
Back
Top Bottom