- Joined
- Apr 5, 2012
- Messages
- 115
After moving to a smaller home a couple of months into the pandemic I had to put my Taxi into the garage until I was able to make room in the smaller living room at our new place. Fast forward 2 years and I was finally able to bring it back inside. That was a moment - the garage roof had started leaking a while back and I was anxious about unwrapping my pin because I didn’t want to be faced with a rusted and/or damp game.
Fortunately the time I’d taken to wrap it and stand it on a pallet paid off. It wasn’t the rusting horror I’d had nightmares about, and after an inspection it turned on with no issues.
There were a few corroded parts: lockdown assembly guide, shooter mounting plate, playfield arm, coin door and playfield bolts, backbox latch to name a few, but nothing too serious.
At this stage I started looking at a new playfield. My Taxi is a keeper because of the epic journey I’d taken with my son to go and get it a decade ago. I found it on eBay.de, and did a road trip to Berlin to pick it up. With that journey in mind I thought it was only fitting that I show the machine some love and get it properly sorted out.
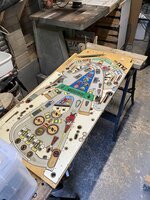
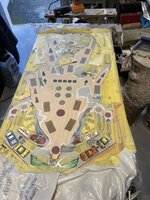
The old playfield wasn’t too bad:
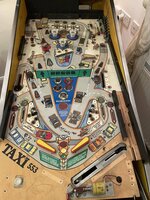
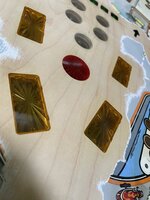
It had the usual wear around the pops and inserts:
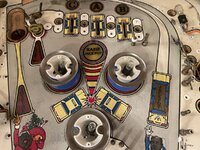
Not bad, and still very playable. I just felt that after it (and I!) survived covid I wanted to get back into it in a big way.
I was about to pull the trigger on a new playfield and posted here to see if someone could do the swap for me as I didn’t feel confident enough to take on a full pf swap.
This project then took an unexpected turn… Mfresh replied with the suggestion that if I didn’t want to do a playfield swap I might want to look at hardtops. I hadn’t heard of them at that time as I’d drifted away from pinball during the pandemic. A quick read of Outside Edge’s website had me all fired up, so I quickly placed an order and started the process of stripping the playfield. Hadn’t done this before - the biggest job I’d taken on prior to now was replacing the flippers and ramps when I first got it home from Germany.
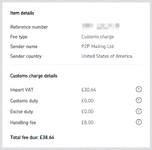
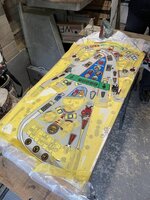
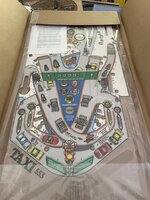
The hardtop soon arrived:
As I was merrily stripping the playfield I realised there was no way that I was going to install the hardtop and then put some of the aged parts back on. Some of them needed fixing rather than replacing. Thanks to @Spandangler for putting me in touch with another PinballInfo member, @replicas, who I met with at Pinfest last month and is kindly doing new steel flaps on a couple of these and my ramps:
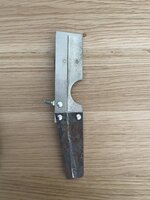
Since then I’ve been ordering all sorts of new parts for it. The old Deutsche Mark coin door has to go:
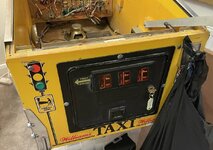
I bought a new blank coin door to replace it.
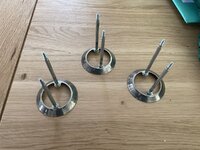
Have also gone for a full LED kit, new rubbers, new plastics set, LED rings + clear bodies + new skirts for the pops, new drop targets, new Carry Passengers target, and red lit flipper buttons.
I also went for a new Spinout bowl, and after reading all 61 pages of the Taxi members club on Pinside have decided to try a magnetic reed switch to see if I can get the ball flying around the bowl a few more times.
Over the last month I’ve been ultrasonic cleaning and tumbling lots of parts, and today I finally finished labelling and unplugging everything from the backbox:
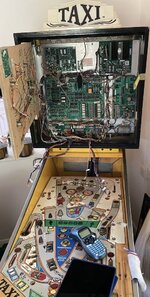
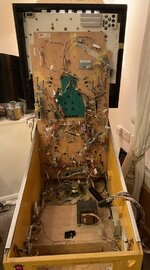
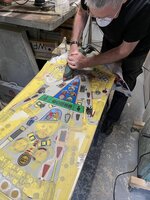
So I’m ready to take the playfield down to my dad’s place - he’s got the sanding gear that I don’t have, so we’ll soon get the pf sanded down and the hardtop installed. And then the fun will really start with the mammoth job of reassembling everything.
This week I’m going to find a local metal finisher to see what they can do with the lockdown guide assembly and playfield strut.
Of course, I’m now looking at the cabinet and thinking that needs love too! Filling, respraying, new rails, and doing decals is going to put quite a bit of time and cost onto this project, but how can I not do it when I’ve already come this far?
Fortunately the time I’d taken to wrap it and stand it on a pallet paid off. It wasn’t the rusting horror I’d had nightmares about, and after an inspection it turned on with no issues.
There were a few corroded parts: lockdown assembly guide, shooter mounting plate, playfield arm, coin door and playfield bolts, backbox latch to name a few, but nothing too serious.
At this stage I started looking at a new playfield. My Taxi is a keeper because of the epic journey I’d taken with my son to go and get it a decade ago. I found it on eBay.de, and did a road trip to Berlin to pick it up. With that journey in mind I thought it was only fitting that I show the machine some love and get it properly sorted out.
The old playfield wasn’t too bad:

It had the usual wear around the pops and inserts:

Not bad, and still very playable. I just felt that after it (and I!) survived covid I wanted to get back into it in a big way.
I was about to pull the trigger on a new playfield and posted here to see if someone could do the swap for me as I didn’t feel confident enough to take on a full pf swap.
This project then took an unexpected turn… Mfresh replied with the suggestion that if I didn’t want to do a playfield swap I might want to look at hardtops. I hadn’t heard of them at that time as I’d drifted away from pinball during the pandemic. A quick read of Outside Edge’s website had me all fired up, so I quickly placed an order and started the process of stripping the playfield. Hadn’t done this before - the biggest job I’d taken on prior to now was replacing the flippers and ramps when I first got it home from Germany.
The hardtop soon arrived:

As I was merrily stripping the playfield I realised there was no way that I was going to install the hardtop and then put some of the aged parts back on. Some of them needed fixing rather than replacing. Thanks to @Spandangler for putting me in touch with another PinballInfo member, @replicas, who I met with at Pinfest last month and is kindly doing new steel flaps on a couple of these and my ramps:

Since then I’ve been ordering all sorts of new parts for it. The old Deutsche Mark coin door has to go:

I bought a new blank coin door to replace it.
Have also gone for a full LED kit, new rubbers, new plastics set, LED rings + clear bodies + new skirts for the pops, new drop targets, new Carry Passengers target, and red lit flipper buttons.
I also went for a new Spinout bowl, and after reading all 61 pages of the Taxi members club on Pinside have decided to try a magnetic reed switch to see if I can get the ball flying around the bowl a few more times.
Over the last month I’ve been ultrasonic cleaning and tumbling lots of parts, and today I finally finished labelling and unplugging everything from the backbox:


So I’m ready to take the playfield down to my dad’s place - he’s got the sanding gear that I don’t have, so we’ll soon get the pf sanded down and the hardtop installed. And then the fun will really start with the mammoth job of reassembling everything.
This week I’m going to find a local metal finisher to see what they can do with the lockdown guide assembly and playfield strut.
Of course, I’m now looking at the cabinet and thinking that needs love too! Filling, respraying, new rails, and doing decals is going to put quite a bit of time and cost onto this project, but how can I not do it when I’ve already come this far?
Last edited:

