What's new
Pinball info

Register a free account today to become a member! Once signed in, you'll be able to participate on this site by adding your own topics and posts, as well as connect with other members through your own private inbox!

[solved] Bally Knockout clicks like crazy when turned on, doesnt move the ball

jww

Site Supporter
Joined
Aug 4, 2013
Messages
145
Location
Walmer
Hello friends,

I just got my first pinball machine a beautiful Bally Knockout. It was working fine at the sellers house but in transport to my house, has developed a problem. I'm not mega sad because have been collecting/restoring videogame cabs for a while and already learnt that old things don't like being moved sometimes etc. Plus I will learn more about my new super awesome machine trying to fix it - woo :)

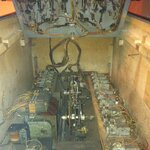
When I turn on the table it clicks like a crazy thing and does not stop. I can see the 'score reset' switches/relays (sorry am still learning so no idea if I'm using the correct names), in the backbox moving the switch things by the 'scores reset' label open and close, I can see little blue dot sparks, which I believe to be normal.

The only other thing I can see/hear moving a horizontal metal bar on the inside of the coin door. I have no idea what it's attempting to do with this. I can trigger this behaviour every time by inserting a coin into either mech.

There is a ball in the 'v' at the bottom of the table (playfield?). When turned off, I can lift it out no problem, it is not trapped. When I turn the machine on, I notice that it does not try to move the ball at all. i.e. it does not fire it into the ball launcher lane/column where the plunger is.

Again, I'm a mega mega newbie, so please forgive me using the wrong words and giving a proper dumbass description of my problem!

I think it's trying to reset the score reels (which are all on zero) and does not know that they are reset. or maybe there's a problem with the coin mech stuff as that goes crazy too.

Since this used to work before I bought it, I'm thinking/hoping it is something simple. But as a newbie, I don't want to wade in and possibly break things as I learn.

I've tried to find a manual for it but cannot - is there a shop you know of where I can buy a manual for this lovely machine?

I've taken a video of it, as pictures are better than words:


I have found a good looking guide - PINBALL Repair EM Electro Mechanical Arcade Games (pinball, pitch and bat, bowlers), part one which I'm starting to read, but I can tell it will take me a while to take that all in - I wont give up though! :)

Just thought I'd ask and see if it was a known problem, or something stupid I had done that could be fixed easily.

Thanks for taking the time to read my post.

Cheers,


Johnny
 
Have you looked on the pinball database they might have the manual to download.
I'm sure someone will be along to help shortly they are a good bunch..... Most the time
 
By the sounds of it the score reels are resetting but the game doesn't know they're at 0 so just keeps trying to reset them. Generally with EM's there are a few different relays that need to be in the right state so you can play a game. I don't have a schematic for this game but you really need to get hold of one as they're pretty much essential when it comes to fault finding an EM game.

Things to check:
  • On each score reel check that the switch is activated when the reel is at 0. This tells the game it has successfully reset them.
  • There's probably something like a Game Over relay, check that is operating correctly (switches as expected)
  • Leave the ball in the trough, the game might need it to be there to operate correctly
  • There will be a ball counter relay, check that is setting itself to 5 (if you've got it set on 5 balls) when you start a game.
Can't think of anything else of the top of my head but when you find the schematic, post a link to it and I'll have a look.
 
Hello,

Thanks for the replies - nice to meet you!

Please forgive the slight delay replying, I’m on call for my job and the chaos monkeys are on the loose it seems this weekend :)

Thanks for your advice Ronsplooter, it’s appreciated. I will redouble my efforts to get the schematics for this game then. Will let you know when I find them as well as have a read.

I’ll get a portable light and get in the back box for a look for your suggestions. Thank you kindly for your advice, it’s great.

Can’t wait to sort this problem out and play the game. I’ve been reading and watching as much as I can about pinball. Have bought some novus 1 2 and 3 and looking forward to cleaning it up once I’ve sorted the problem. ( I will read up more before cleaning though as I want to be careful ) Then on to waxing - this is all exciting stuff I can't wait to gain experience of doing.

Thanks again for advice friends, I’ll report back.

Cheers,


Johnny
 
Hello again friends,

I've made a little progress investigating the constant clicking. Sorry my investigation is slow, I am a mega newbie and have a crazy full on job which usually beats me up each day but I will never give up ! Hurrah! :)

I have found a few people on the internet flagging that pinball mike has lots of schematics and indeed he does list a bally knockout schematic on his website, so I've mailed him asking if he still has it for sale. Once I hear back, will try to buy it so can continue my investigation better informed.

In the meantime I figured I'd sit and just look at the inside, to see if I can observe anything wrong/missing/melted etc and I've found a couple of things that stand out to a newbie like me as something to look at/mention/investigate.

The first thing I noticed is that in the backbox unit is player 2 coil (i hope that's the correct word) has no clip or spring on it. Every other coil I see with that metal surround, does have a spring:

IMG_0325.jpg

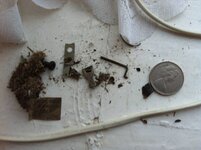
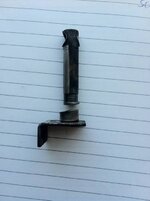
Luckily when I got the pinball machine I went inside and pulled out loose bits that I found in the bottom rattling around. One of the things I found is the clip! (center of image) - woo hoo :) Apart from the coin, I don't know what the other bits are but I have kept them in a tin. This clip fits in the coil plate, just need the spring for it now.

IMG_1048.JPG

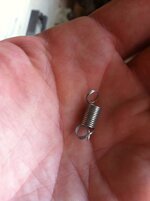
I found half a broken spring, so need a new one. Do you know what size spring I need for this? I have no idea if I measure the coil of the spring or the full length including ears. i.e. measuring the spring on another coil:

IMG_1095.jpg

or do I measure it as thus instead?:

IMG_1094.jpg

I don't know if that's my problem, but it looks like 'a' problem to me. Would like to buy the correct sized spring for that.

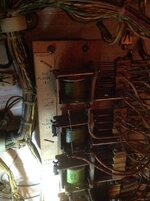
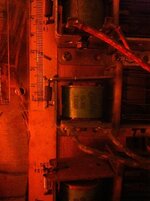
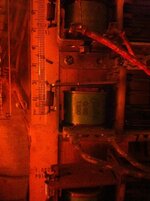
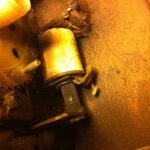
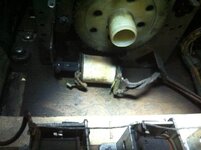
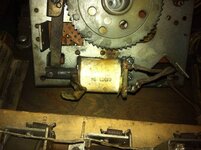
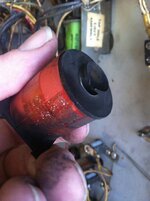
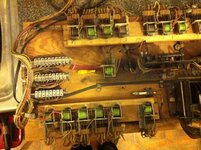
I carried on looking to see what I could see and found another coil (again, sorry if I'm using the wrong word) which looks like it had melted plastic and spewed it out. It's the coil on the unit inside the machine closest to the front in the first pic, then I show close up pix of it afterwards. The unit has a hand written note on it saying 'center lane unit'.

IMG_1101.jpg

IMG_1099.jpg

IMG_1106.JPG

IMG_1110.jpg

I've been doing all my investigation with the machine off, as until I get the schematics and then my multi-meter on things, i don't want to blow myself or the game up. Regarding that coil and motor unit above, I can say that with power off, pressing the shaft? of the coil in, moves/ratchets the wheel around smoothly. it keeps going. i.e. after X clicks, it does not stop, unlike other motors I've seen in the game. this one you can click the coil shaft in and it rotates one notch of the big wheel each time, and you can do this forever. Other one's I've seen in my game stop after N clicks, until another coil resets it.

Forgive the stupid question, but am I correct in that this coil has died and that I should replace it?

I will keep reading that repairing e.m pinball games By Clay Harrell (http://www.pinrepair.com/em/index1.htm) and tonight will be reading to find out if I can test coils with the kit I have (multi-meter), again, learning, long before I test anything with the power on. I love this game and quite enjoying investigating this problem. Despite not knowing anything I hope that I'm showing you the care and respect I'm giving this fabulous old game. Can't wait to fix it up properly and without hurting it.

Cheers,


Johnny
 
Some good fault finding there fella. Yes you need a spring ASAP for that score reel. If you still have the remains of the old one you can normally unwind one of the windings and use that as a new hook to connect it in place. Only a temporary fix until the new spring arrives but if the game then fires up it'll be worth it.

I agree with you that it looks like the coil has melted and should be replaced. However if it's working with power on then that's the least of your problems right now.

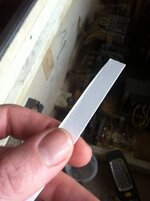
Cleaning each and every switch contact will sort a lot of problems, especially the centre lane unit. Clean with a piece of cardbeing swiped through between the contacts ought to do the trick in most cases.

Good Luck!
 
Hello Moonraker and other friends who've kindly helped me in this thread.

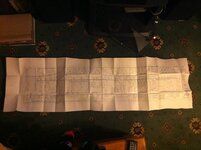
Very sorry about the tardy reply. I'd been waiting for the schematics to arrive, which I'm happy to say have arrived today from Pinball Mike in USA (I'm in the UK). I struggled to find them, eventually reading threads for hours and someone recommended his site so I emailed him. He had them in stock and I've just got them today. They're massive!

IMG_1270.JPG

I got some replacement springs, but frustratingly they are 2mm ish too big. I'm going to have a go at cutting them and doing some winding with a pair of pliers tomorrow and see how I get on. If it's a no-go, I'll get back on the net and try to find some others.

Since I last posted, not much progress has been made because I didn't want to hurt anything due to my lack of knowledge and no schematics to look at. I did however take the mechanics board (sorry if this is the wrong name), which is the long plank of wood inside the machine, with all the switches, coils, wires on it etc. I've cleaned out the inside of the machine, finding some old coins but no other parts.

Am going to clean this inner mechanics board at the weekend. it is really dusty and has lots of coloured dust around the switches, as if the fillings of metal from the parts moving have fallen into little tidy piles. I'm going to be very careful doing this, will not use any cleaning stuff. Am just thinking about using a hoover gently while not touching any of the parts, and a can of compressed air. Is that a safe way to do it?

Thanks for the card tip to clean the switches Moonraker, appreciated. That's a nice idea as I can't hurt anything and it will familiarise myself with all the switches. I'll get on the case tomorrow and report back.

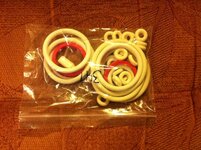
Also arriving today was a full rubber set from a German seller on ebay:

IMG_1271.JPG

Am smiling now I've got my schematics. Ok, so I don't know how to read them yet, but I will learn and am excitedly looking forward to knowing more about pinball machine repair, and fixing then playing on my game. Today is a good day :)

Cheers,


Johnny
 
In addition to the excellent pinrepair site you found, I'd recommend trying to get your hands on a copy of "Pinball Machine Maintenance" by Henk de Jager. Pinball Resource sell them in the US, and occasionally they pop up on Ebay over here. In addition to explaining how to fix electromechanical pinball machines, it also attempts to explain how they work to some degree. I only ever had one EM machine and I found this book invaluable in helping me to fix it up in conjunction with the pinrepair site.

Mark
 
Oh cool, thanks Mark, that's kind of you to point me at that. I'll get hunting for that book as it is all alien to me at the moment. I've got a few videogame cabs and had to learn from nothing, how to fix and repair them (to a basic level, I'm no expert - i.e have replaced caps in monitor and wired in new looms, psu's etc) and am much more confident at sorting out problems with those now I've got some experience under my belt. Am sure as I make progress with this pin, it will get a bit easier too! :)

Right, time for me to get on. Today's goals are to carefully hoover and blow the dust of the inner big board, mod my new spring and fit to the coil in the backbox which was missing one. I'll also use the card swipe through switches tip on all switches as suggested. If I can re-find the paragraph I read a while ago about how to test coils with a multi-meter, will also have a crack at that. I especially want to test that coil which had oozed plastic out of it, as that looks like a problem.

Red-5 going in :)

Cheers,


Johnny
 
Hello again friends,

Little bit of an update today.

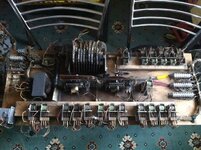
Ok, so found that I'm out of compressed air to blow dust out - have got some on order, will have to revisit the cleaning of the inner mechanics board. Also need a smaller hoover. I had to back off with my regular hoover as it's too unwieldy and I felt like if I continued I would break something, so aborted and will get a small computer keyboard hoover type thing and try again, coupled with compressed air cans to blow the old dust out. Regardless the little bit of very careful cleaning that I could do was pleasing. Before and after pix show that I could only hoover the large uncluttered areas:

IMG_1274.JPG

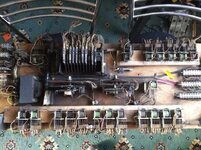
after, a tiny bit cleaner:

IMG_1275.JPG

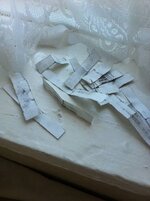
Next, following the tip, I found some white card, probably a bit too thin, but doubled it up and very carefully swiped it between every switch that I could. Note for me: missed a handful of switches due to not having arms like Uri Geller's spoons, but will re-attempt on next cleaning mission.

Before using the card:

IMG_1277.jpg

After I've finished swiping card through each switch I could get to, a few times. Eww!:

IMG_1280.jpg

Next up was to try fitting my new spring in the backbox. Damnit, it is indeed a couple of mm too big :( After a battle with the pliers and some wire-cutters I managed to make a spring of the correct size:

IMG_1282.jpg

That's now fitted, so I can cross one problem off my list and I've fixed my first problem ever on a pinball machine! wooo :) I know it's super simple fitting a spring to a coil device, but this whole field of pinball repair is daunting for a newbie. I'm super proud I spotted that was missing just by sitting down and staring at the machine. First thing done, excellent. Right, lets move on...

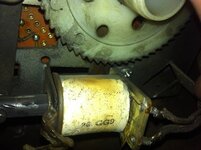
Next up, I wanted to identify the coil with that plastic gunk that had oozed out of it as it looked suspect. Couple of photos coming up:

IMG_1285.jpg

IMG_1288.jpg

The coil says 26 GG9 on it. I did a quick bit of searching and got confused so backed away for now, I need to learn more. But I wanted to use my new schematics and start trying to learn my first thing about reading them. The device this coil is on, has a hand written sticker on it saying 'center lane unit', so I looked for that in the schematics and found it by a squiggle that I believe to be the coil symbol. I wont put a picture of the schematics up, as don't want to cause legal issues, but the info is:

Center lane unit step up solenoid
b-27-1300

I've also got a Bally Parts catalog from 1976 so looked through that and found in the 'stepping units, continuous' section that it confirms the center lane unit coil is a b-27-1300.

Thanks for the offer PinballDaze, if you have one for sale, I'd be interesting in buying one from you.

Wow, this forum is full of very nice, clever and helpful people, very pleased to have joined!

Ok, so the next big thing I want to do is finish cleaning that inner mech board. It's covered in dust and metal filings, some of it sooty. Since I've cleaned the empty inside of the machine and will have to work on parts of the rest of it, would be nice to get all the smeg off the inner board before continuing. Once my new cans of compressed air arrive and a smaller precision hoovery type thing, am sure I'll be able to finish that off.

Have been reading about testing coils with a multi-meter. Seems like you just set it to ohms setting, then put one lead on each side of the coil. From what I read anything 3 -ish is fine, 0.2 is shorted and bad. I will read up more but that seems like a quick and easy way to test everything, especially that coil pictured.

After the cleaning and coil testing/replacing stage is done - I want to clean up the Jones plugs. They look pretty dull and are horrid to unplug/replug. Have read several different opinions about the way to clean up, but the safest seeming to be sanding with fine wet n dry paper for the male end, and a circular file for the female end.

Thanks for all the help and advice again, appreciated my friends. Will post update again once I've done the cleaning and coil testing.

Cheers,


Johnny
 
Hello again friends,

Apologies about extended delay, my job keeps me away from doing what I want in a lot of evenings (damn on-call!) and I'm trying to fix up my pacman pcb, restore my Initial D arcade cab and planning the resto of Atari Gauntlet at the same time lol :) I haven't left you and I will not give up or cut corners on fixing my Knockout machine. I'm just such a newbie that I am planning, thinking and learning because the last thing I want to do is break/ruin/treat it badly.

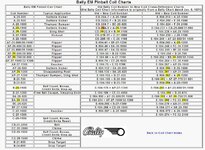
PinballDaze - Big thanks for your offer sir, that is very kind. I don’t know enough yet about how coils work yet, so I’ll be going for an identical one that matches the schematics, but thank you once again. That is kind *bows*

Paul - Oh wow, thank you. I think you read my mind, as I was looking for a guide about what that one is, that I will replace, that is an invaluable chart, thank you very much. I found the alternate parts thread but think my machine is too old as it wasn't listed. That link/picture you provided looks like gold to me, so I'm having that for sure :)

Progress:

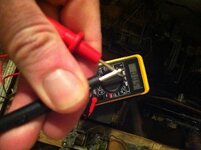
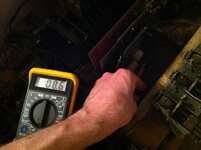
Ok, I've read that I should set my muti-meter to ohms then short the leads and observe the value. Then put the leads onto the coil and if the reading is the same as previous value, then the coil is busted. If the reading is much higher, then it's fine. Hope that's right, I had a go at that, and it suggests the coil is ok, but given we know it's not the correct coil, then I've decided to replace it with the correct one regardless if it's fine or not, despite the plastic spew it did. Pix of testing:

IMG_1384.jpg

IMG_1386.JPG

That was a few days ago. Bit of a shame, as with that hard plastic which had oozed out of that coil, I was sure that was the problem and that I had found it!

No matter, time to carry on.

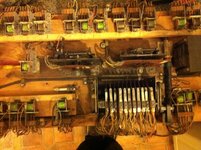
Next I wanted to clean that bigger inner mechanics board as it was sooty and filthy. More so, given that I had cleaned the inside of the machine, so didn't want to put that board back in all filthy. I bought a tiny hand held hoover to clean this up. It did the job, but the hoover died immediately upon finishing the cleaning and it wasn't as good as I hoped, but it was cheap, so no mater. They are £10 on ebay, but I personally recommend you don't get one, they're cheap crap. Pix of the very careful and gentle cleaning which took hours and hours and hours. Observations that I wrote down are that some of the soot appears to be oily, but not massively so. I have read not to oil/lubricate anything, so I'll stick to that. Just pointing out an observation about what was there.

Just started hoovering from the right hand side up to and including the psu:

IMG_1486.JPG

Hoovering all done, it does look vastly better honest - shame it doesn't appear to show that well in the pictures:

IMG_1487.JPG

One day, I intend to take the whole thing apart and clean it and sort out some wiring that has been done after it left the factory which looks a bit rubbish, but that's way down the line. For now I only want to fix it as I haven't played on this beauty once yet. I'm super happy about the cleaning, as I can read most of the labels now and it's a good starting point before fixing, and I would recommend it to all newbies. Because if you hoover/clean very gently, you have to observe and touch every component, so it helped me become more familiar with the bits n bobs in the machine:

IMG_1488.JPG

IMG_1489.JPG

Next up, I had read many stories about Jones plugs (I hope thats the right name) not making contact and have had advice about that from members here, so I got some ultra fine wet n dry paper, and in dry mode, gently sanded each pin, before cleaning with a cotton bud and some isopropyl alchohol. Top plug is not done, bottom plug is done in the following picture:

IMG_1490.jpg

IMG_1491.JPG IMG_1492.jpg

Since I had to take the chime box out to take out the inner board, I didn't want to put it back all dirty so cotton bud and isopropyl again, before and after pictures:

IMG_1493.jpg

IMG_1494.jpg

Ok, right, so at this point I've cleaned the inside of the machine previously, now have cleaned the inner board and cleaned up every pin on every Jones plug that I could:

IMG_1495.jpg

So the next day I plugged it all back together, turned it on, started a game... and still the same problem. Heh and damnit.

I've got a Bally b-27-1300 replacement coil on order now, so once it arrives will replace that wrong and poorly looking one on my center lane unit. I assume I can just unsolder the one that's there and solder the new on in ? Can I just wire it in the same way, or might it need installing the other way around? Sorry if stupid question, but I don't want to assume anything if possible.

I've got a full rubber set, but wont install that yet, I will wait until I've got it working as am leaving the glass off, as I need to access the machine to fix it.

My ball feels rusty. No laughing at the back ;) So I'm going to try to measure it and order a new one following the tip that a rusty ball will massacre the table. I'm rubbish at measuring something that doesn't have a straight side but going to have a go :)

I am still feeling that because I'm a total newbie, that I'm missing something terribly obvious. This was working and was shipped by a trusted and regularly used courier, who we all use on the Jamma+ forum, and was delivered without any harm. I'm really thinking that something has just shaken loose that I haven't observed yet, as it did work.

This got me thinking. Without the skill/eyes of a seasoned pin-head, or access to any chums to help in person, I was thinking what the smeg I should do next....

I've decided to test all the coils, with my multi-meter, in case I can find one dead, as it's not that hard to test them. I will do this and report back. I doubt it's this as it was working but maybe something has fallen and shorted something so when I first turned on the machine I killed something? Sorry, thinking aloud really.

I also thought that perhaps if I paid more attention I could see something going wrong. I'm not sure, but I've found something wierd. Sorry I ramble, I'll try to describe this as best as I can, if not only for just my records....

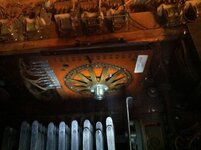
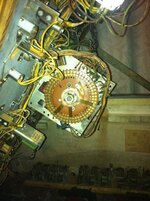
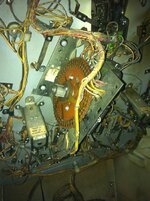
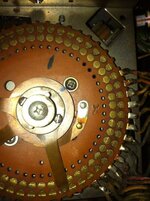
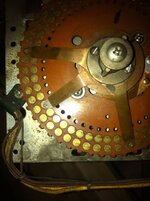
Today I sat on the floor again, opened the coin door, turned the game on. Loud buzzing from coin door like normal, insert a coin then it starts looping trying to reset the game. I sat looking in with my torch and finally I saw something that might be a problem. On the underside of the play field table, there is a coil on a stepper? unit. It's a big massive wheel where the arms of the wheel coming out from the center each make contact with rivets. It looks like the coil should fire and rotate the wheel around to make different contacts. Just now I saw that when the game is trying to reset/clicking like crazy, that the coil on that unit is firing/moving the rod, but that the copper/brass big massive wheel is not turning.

That doesn't feel right to me. but it's tricky to see from peering in through the coin door. I'm going to have a think about how to capture this on camera and will try to video it and put it on youtube, linking to it from here once I've done it.

After dinner tonight, I'll lift the playfield table up (with power off of course)and then look at that unit, to see if I can see if something is blocking the moving coil from being able to rotate the wheel around; as well as get the name of that unit and read about it in my schematics!

This is super exciting. I hope I'm on to something. If nothing else, I'll learn how those units work, and that's only a good thing too :)

Red-5 going in! Thanks for all the help and advice my friends. I love this hobby and this forum. We're going to do this!

Cheers,


Johnny
 
Hello again friends,

Thanks for the kind words Replicas and the likes too everyone :)

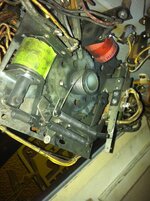
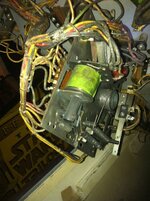
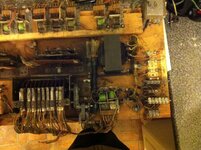
I've taken some photos of the thing I suspect is the issue, it's got a label on it called "Bonus Unit 2".

Notes:

* I've realised that I failed to clean the underside of the playfield table. Doh. This is now on my to-do list. I missed it before because I had lifted it out of the table, to do the previous cleaning. Out of sight, out of mind!

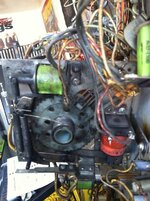
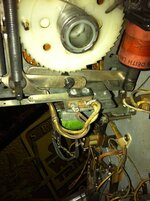
* I noticed as you will see in the first few photos that the cog on this unit which has two metal pegs in it, and is clearly supposed to rotate, had gone perhaps too far, bending two leaf spring switches (hope that's the right name). They were bent over so far it didn't look correct. So I very gently did a combination of pressing the coil rods in, compressing springs to gently rotate the cog back a few clicks until the switch leafs were straight, not bent right over. I did find a combination of gently touching stuff to cause the cog to automatically rotate back a bit as if unwinding a very wound up spring. You should be able to see the before and after in the pictures at the bottom of this thread. This did not solve the issue, no change, but at least the switches are not bent over so unnaturally.

On other units inside the machine, which are similar, one coil advances the cog one step at a time, and the other coil releases the cog, so it spins back to a default position.

On this unit, the red coil doesn't appear to do anything when the rod is gently compressed by hand, with the power off.

* Deciding that I want to see things better to get more information, I set up a torch and camera carefully inside the machine, taping them to the side and have taken video of each side of that bonus unit, with the game on. This was a useful exercise because my earlier observation yesterday is slightly incorrect. True the cog does not turn, but only the green coil fires, the red coil wobbles but doesn't appear to fire the rod. So it's just one coil firing not both on that unit.

It seems to me that the cog is binding or something simple has become unclipped, causing it to not want to automatically re-wind once triggered.

* I will be reading my doco/parts catalog/schematics and EM repair guides online to learn more about how this unit works, what it's default rotated position should be etc.

* I did test the green and red coils and both had a decent ohms resistance on each of them, far higher numbers than when I short the terminals on my multi-meter.

Pictures and video coming up:

IMG_1497.jpg IMG_1498.jpg IMG_1499.jpg IMG_1500.jpg IMG_1501.jpg IMG_1502.jpg IMG_1503.jpg IMG_1504.jpg IMG_1505.jpg IMG_1506.jpg IMG_1507.jpg IMG_1508.jpg IMG_1509.jpg


I'm quite excited as my spider sense is telling me that this unit is a problem, if not 'the' problem. And given that the coils appear to test ok, I'm sure it's just something simple. I'll read up tonight about those units, have a think and take things from there. I'm pretty sure that by manually moving the rod into each coil on that unit, that the cog is supposed to rotate and it only does with one of the coils. The other appears to do nothing when compressed. That feels a bit wrong. I think it should rewind the cog. But I'll read up and report back!

Cheers,


Johnny
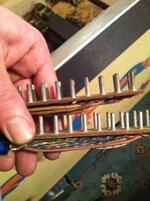
 
Johnny, just to give you some info, this stepper unit will count up the bonus you build up on a ball so as part of the game restart process it's trying to reset to zero. Something is stopping that happening so the game just keeps on trying to reset it. You can see all of the different things that activate as part of a game reset on your schematic (score reels, game over relay etc).

Your correct about both of the coils on that unit doing something. I don't know the specifics for this game but one will advance the stepper through 1 position to increase bonus. Each time the coil activates it should move the wiper one position up to the maximum. The other coil will do one of two things depending on the game.....most likely is that it resets the wiper back to it's 0 position or it decrements the bonus by one until it reduces to zero. Either way, this is needed to reset the game so you can start a new one so if it's not working then this could well be your issue. When the wheel moves round to it's zero position I'd expect some sort of lug or arm on the wheel to activate a switch so the game knows it's zero.

As you say, first thing is to figure out why only one of the coils seems to do something :)
 
Hi Ronsplooter,

Thanks for the advice sir, that's ace. I'm really pleased and do feel that I'm on to something. Your advice makes a lot of sense.

I've been reading my Bally 1976 parts catalog tonight and there are lots of diagrams of the stepper units. I think I've found the bonus unit one and am reading over it right now. It doesn't seem to show the two pins in the cog which triggers the switches, but diagrams for other types of unit do, so I'm going to carry on reading. I'll also refer back to my schematics, which are terrifyingly daunting for a newbie, but I worked out what coil I needed for the center lane unit previously using them, so will try to find the reset stuff you kindly pointed me at.

Thanks once again for the advice, I really appreciate it. This is great, hopefully I'll crack it soon!

Cheers,


Johnny
 
For what I know about EM machines you can write on the back of a postage stamp.
But I have had a few in the past and it sounds like its a relay one step out. The person to ask about any EM problem is Dave Dutton on the U.K. Pinball Yahoo group.
Its rare he will come onto the forum so try him on there.
Good Luck.
 
Hi Replicas, That's ace, thank you my friend, most kind.


Just a quick post as I don't have much time. It's amazing what the untrained eye, and untrained photographer do not see/don't take pictures of! If I'd taken pictures of the side of the bonus unit up close I bet I'd have seen this sooner. The red coil has very worn shaft/parts and had a missing screw holding it to the chassis, so it's been wearing away at itself/things for years.

I think in travel the very loose coil shook loose enough to jam itself and the arm from moving properly. Then each time I turned on the machine to test/investigate, a part was being hit by the other arm (as intended), but couldn't move because it was stuck. I believe this broken off an l-shaped part of metal from one of the arms.

I think the part is called the reset arm pawl. It has little l-shaped piece of metal which catches the step-up arm, releasing the brake from the wound-up cog, which then resets to zero - probably hence the machine spamming it each time I turned it on!

I only saw this by a) taking a video to observe what was happening better than before; b) cleaning the whole unit, which was enjoyable and got me familiar with the parts; then finally c) where I got up close and eventually saw a broken off piece on that arm, then the loose coil bits.

I've got a new arm on order from the states, and my mate is going to try to weld a replacement bit on to my one. I will research what coil and associated parts I need to sort out the loose stuff and I really really think I've found it!!! I'm so happy!!!

To be clear, I'm super happy I bought this table, and that I think that I probably broke that arm l-shaped part by not noticing that loose/worn stuff had got itself jammed. I'm pretty sure I'm right, as after cleaning and resetting it manually, I can now operate step-up and reset of that unit, manually (with power off) and a few fingers helping where the broken off part was. I'm so happy! Will report back once I get the bits replaced.

For now here are some more pictures of how I got on:

Missing screw holding coil in place, other screw loose, causing coil to move about drunkenly:
IMG_1523.jpg

But, as posted previously, I collected all loose parts that I could find when I got the machine, one of which was a screw:

IMG_1537.jpg

(pre-cleanup, so the loose screw is dirty) It fits perfectly! 1 problem solved and parts reunited. Wooo :)

IMG_1539.jpg

Cor, check out the wear on this bad boy:

IMG_1558.jpg

And the looseness likely caused this shaft to get terribly worn, causing even more looseness/chaos:

IMG_1560.jpg

p.s - in the picture above, should the right-hand side coloured section have some sort of washer on it? It looks marked for a reason but I've not seen a new coil shaft, so unsure what it should look like. I will take apart a working coil when I get time to look, but I think it needs something there, as the shaft is very loose in the coil, i.e. it's not a perfect fit.

Check out the wear on this: (also: I'm guessing I need to replace the bracket-stop thing too as it's worn? or would I receive one with a new coil?)

IMG_1571.jpg

Here's where the piece broke off because I'm crap and didn't notice it was jammed so he other arm was hitting it repeatedly trying to lift it, until it ping'd off :
IMG_1577.jpg

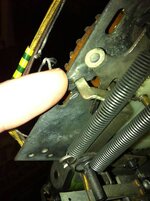
You can see the wear on the other arm my thumb is on which used to lift the arm to the right of it:

IMG_1579.jpg

Part removed as I cleaned the whole unit up, also to do better identification. I marked with pen on the arm, to show how far the broken off piece needs to go, so that my mate can weld a new part of perfect size:

IMG_1592.jpg

Following tips, I put a sheet down first to protect the newly cleaned insides. Note the dust and smeg caught, that was just from 2 mins cleaning of the bonus unit!


IMG_1599.jpg

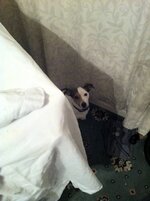
And watch out for Terriers when pinballing :)


IMG_1601.jpg


I'll probably fit the replacement part from the states, but if my mate fixes my original part first, I will try it out and keep it as a spare. But I really do think I've found the problem now. My video clearly shows the machine spamming that unit and it not rotating. I've cleaned it up and can manually operate that unit now. Once I get the replacement arm, I'll test it out. In the meantime I'll investigate that coil/shaft/stop parts that I found which were worn and replace them.

Am soooo happy because I really think I'm there now!

Thanks for all the help and advice, I couldn't have got this far without you! :) *bows*

Watch this space. Red-5 has just turned off his targeting computer.....

Cheers,


Johnny
 
Hi Replicas, That's ace, thank you my friend, most kind.


Just a quick post as I don't have much time. It's amazing what the untrained eye, and untrained photographer do not see/don't take pictures of! If I'd taken pictures of the side of the bonus unit up close I bet I'd have seen this sooner. The red coil has very worn shaft/parts and had a missing screw holding it to the chassis, so it's been wearing away at itself/things for years.

I think in travel the very loose coil shook loose enough to jam itself and the arm from moving properly. Then each time I turned on the machine to test/investigate, a part was being hit by the other arm (as intended), but couldn't move because it was stuck. I believe this broken off an l-shaped part of metal from one of the arms.

I think the part is called the reset arm pawl. It has little l-shaped piece of metal which catches the step-up arm, releasing the brake from the wound-up cog, which then resets to zero - probably hence the machine spamming it each time I turned it on!

I only saw this by a) taking a video to observe what was happening better than before; b) cleaning the whole unit, which was enjoyable and got me familiar with the parts; then finally c) where I got up close and eventually saw a broken off piece on that arm, then the loose coil bits.

I've got a new arm on order from the states, and my mate is going to try to weld a replacement bit on to my one. I will research what coil and associated parts I need to sort out the loose stuff and I really really think I've found it!!! I'm so happy!!!

To be clear, I'm super happy I bought this table, and that I think that I probably broke that arm l-shaped part by not noticing that loose/worn stuff had got itself jammed. I'm pretty sure I'm right, as after cleaning and resetting it manually, I can now operate step-up and reset of that unit, manually (with power off) and a few fingers helping where the broken off part was. I'm so happy! Will report back once I get the bits replaced.

For now here are some more pictures of how I got on:

Missing screw holding coil in place, other screw loose, causing coil to move about drunkenly:
View attachment 5496

But, as posted previously, I collected all loose parts that I could find when I got the machine, one of which was a screw:

View attachment 5497

(pre-cleanup, so the loose screw is dirty) It fits perfectly! 1 problem solved and parts reunited. Wooo :)

View attachment 5498

Cor, check out the wear on this bad boy:

View attachment 5499

And the looseness likely caused this shaft to get terribly worn, causing even more looseness/chaos:

View attachment 5500

p.s - in the picture above, should the right-hand side coloured section have some sort of washer on it? It looks marked for a reason but I've not seen a new coil shaft, so unsure what it should look like. I will take apart a working coil when I get time to look, but I think it needs something there, as the shaft is very loose in the coil, i.e. it's not a perfect fit.

Check out the wear on this: (also: I'm guessing I need to replace the bracket-stop thing too as it's worn? or would I receive one with a new coil?)

View attachment 5501

Here's where the piece broke off because I'm crap and didn't notice it was jammed so he other arm was hitting it repeatedly trying to lift it, until it ping'd off :
View attachment 5502

You can see the wear on the other arm my thumb is on which used to lift the arm to the right of it:

View attachment 5503

Part removed as I cleaned the whole unit up, also to do better identification. I marked with pen on the arm, to show how far the broken off piece needs to go, so that my mate can weld a new part of perfect size:

View attachment 5504

Following tips, I put a sheet down first to protect the newly cleaned insides. Note the dust and smeg caught, that was just from 2 mins cleaning of the bonus unit!


View attachment 5505

And watch out for Terriers when pinballing :)


View attachment 5506


I'll probably fit the replacement part from the states, but if my mate fixes my original part first, I will try it out and keep it as a spare. But I really do think I've found the problem now. My video clearly shows the machine spamming that unit and it not rotating. I've cleaned it up and can manually operate that unit now. Once I get the replacement arm, I'll test it out. In the meantime I'll investigate that coil/shaft/stop parts that I found which were worn and replace them.

Am soooo happy because I really think I'm there now!

Thanks for all the help and advice, I couldn't have got this far without you! :) *bows*

Watch this space. Red-5 has just turned off his targeting computer.....

Cheers,


Johnny
Great news. Well done in finding the problem and lets hope its going to be sorted when the parts turn up.
 
Hello again friends,

I have another update for you, which I'll give in chronological order.

17 Feb:

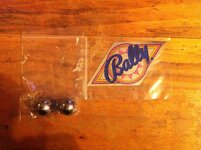
My new balls arrive (tee hee) and a Bally Sticker:

IMG_1621.JPG

Quick question: I'm now doubting if I should apply the sticker to my coin door, which does have a diamond shaped insert, the size of the sticker, because I can't see such a sticker in the flyer for this table. Would appreciate opinions on this one. I want to keep this machine completely vanilla, just want to restore it to lovely factory condition where possible.

19 February:

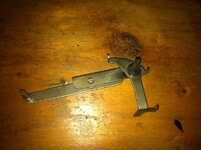
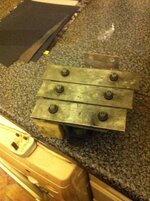
New step-up arm thingy arrives. Damnit, while it is identical size as best I can tell, on one of the flat parts, it has 2 holes in it, rather than the 1 on mine, but apart from that it's the same as the part I found with a broken off piece, mentioned previously: (Holes in question are facing away from camera so cannot be seen in this picture - damnit, I'll never be a proper photographer will i?)

IMG_1626.JPG

20 February:

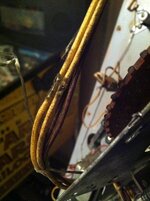
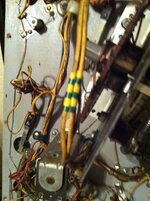
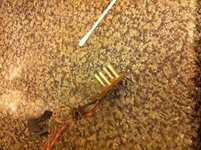
Those slightly frayed wires, which look like they were tied to that bonus unit previously (no doubt causing the fraying) were bothering me. I'm not sure they were touching and shorting but it bugged me:

IMG_1627.jpg

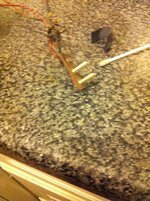
So I used some insulation tape to protect them:

IMG_1628.jpg

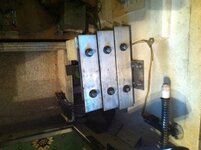
Ok, after much comparing of old step-up arm (i hope thats the right word) and the new one, decided that it's just cosmetic differences and worth a go, so carefully fitted it to my cleaned up bonus unit, following my disassembly notes and pictures somewhat nervously:

IMG_1629.jpg

Here's a picture showing the replacement part that was broken on the piece I replaced. I really think that this was why the resetting/step-back action couldn't work, that I saw on my video I posted previously, and to be clear, I believe this broke in my possession, because I hadn't noticed it was jammed due to my newbie-ness:

IMG_1630.jpg

Ok. Totally nervous as hell at this point so decided to walk away and have a cup of coffee and think, knowing that if I rushed anything, due to my newbie-ness, bad things could happen.

After a bit, reasoned that I should try operating the unit manually with the power off and see if the step-up, step-back/reset actions worked. They seemed to. Perhaps not as I had imagined before, but then again I didn't know what it should do 100% before. But I had seen it (in my previous video) not moving at all. Now one coil made it step up that cog in one direction, and the other coil made it step back. The pins sticking out from that cog, when at the suitable rotations, closed/opened switches, presumably to tell the game it was at the beginning/end of the operation. This felt sensible and vastly better than before.

So, I put Raiden my terrier in the kitchen as the constant resetting scares him. I gave it a go. Would I get my first ever game on this, my first pinball machine?....


Cue: hearing Stan Bush - The Touch, music in my head and a lot of tears...

Forgive me ending the post here for now, I am rather unwell and needing bed, but figured you may want to read my new update.

Take care friends and speak soon.

A massive thank you to everyone here and on jamma+ who has given me advice or just friendly words. I cannot thank you enough.

Also I would like to give a very big thank you to Mr Luke Wells, who without knowing it, has helped me greatly, as I have worn out his many superb youtube videos on pinball repair. You gave me the inspiration and confidence to do this sir, thank you.

Cheers,


Johnny
 
Back
Top Bottom