Do you have a before picture for a comparison? 
Pinball info
You are using an out of date browser. It may not display this or other websites correctly.
You should upgrade or use an alternative browser.
You should upgrade or use an alternative browser.
In Progress Rocky & Bullwinkle Shop Log
- Thread starter Wiredworm
- Start date
It's going to take me a while to fully clean off the cleaning compound and i'm an impatient bugger so i've taken some photos to show the work. Just ignore the white gunk that's still in a lot of the holes and slots. I'll most likely clean that up over the coming days.
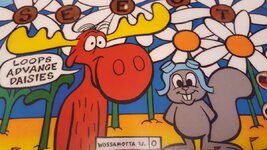
Perhaps the most noticable thing for me on the playfield was a ding to the left of Bullwinkles nostril and also a section of the green plant to the side of him which had been damaged.

Whole thing looks much nicer now.
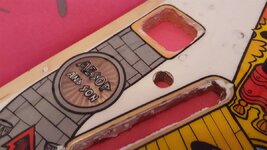
And of course Aesops hole was also worn. I've got a cliffy for it now but I wanted the original artwork putting back in place. So it went from this.
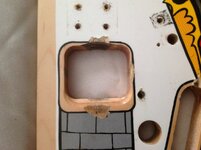
To this.
The majority of the damage on the playfield was actually pretty minor but it covered a fair expanse so the amount of work needed wasn't small. Consider this area at the top of the playfield where there were some ball marks and a number of chips.
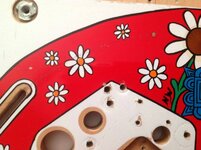
Now it looks like this.
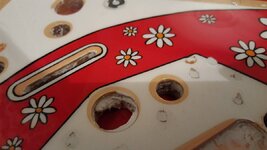
Natasha also had a bit of a mark on the left side of her, so I asked Chris to fix that up. It went from this.
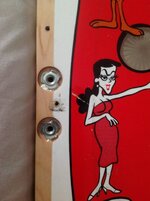
To this.
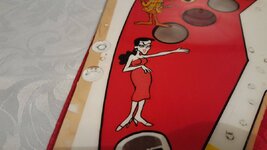
So yeah, all looking pretty nice. Here's some more gratuitous shots of various parts of the playfield.
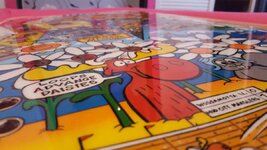
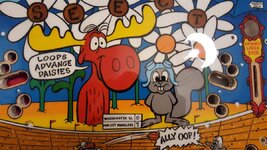
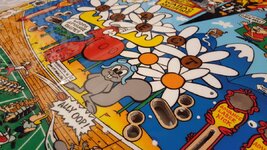
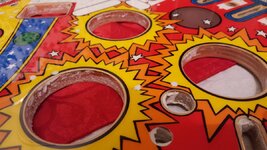
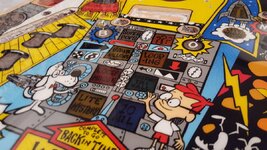
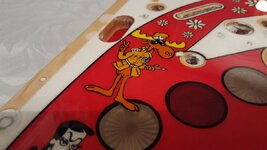
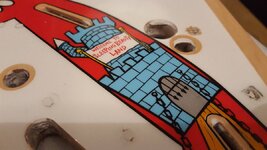
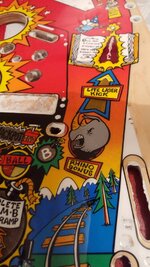
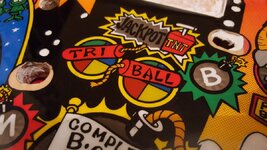
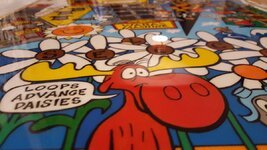
Of course the question now is if I leave it at this or go a level further to offer the playfield a little more protection. Unfortunately they don't make the makrolon protector for this machine yet but I could get a sheet and make one myself using Nedreuds guidance as inspiration. ;-)
Perhaps the most noticable thing for me on the playfield was a ding to the left of Bullwinkles nostril and also a section of the green plant to the side of him which had been damaged.

Whole thing looks much nicer now.

And of course Aesops hole was also worn. I've got a cliffy for it now but I wanted the original artwork putting back in place. So it went from this.

To this.

The majority of the damage on the playfield was actually pretty minor but it covered a fair expanse so the amount of work needed wasn't small. Consider this area at the top of the playfield where there were some ball marks and a number of chips.

Now it looks like this.

Natasha also had a bit of a mark on the left side of her, so I asked Chris to fix that up. It went from this.

To this.

So yeah, all looking pretty nice. Here's some more gratuitous shots of various parts of the playfield.


Of course the question now is if I leave it at this or go a level further to offer the playfield a little more protection. Unfortunately they don't make the makrolon protector for this machine yet but I could get a sheet and make one myself using Nedreuds guidance as inspiration. ;-)
- Joined
- Oct 28, 2012
- Messages
- 290
Don't don't don't put a makrolon protector on. Ruins the game and slows the playfield right down, plus adds extra ball hang ups
Surely a custom made one won't cause ball hang ups? The whole point is the only places which won't be covered will be any areas where a cut needs to be made for a post.
Of course i'm only too happy to take advice on this but the feedback i've heard from Nedreud on his custom made protector is that it actually made his Gold Ball play even faster.
But of course i'm happy to hear everyones views before deciding which way to go
Of course i'm only too happy to take advice on this but the feedback i've heard from Nedreud on his custom made protector is that it actually made his Gold Ball play even faster.
But of course i'm happy to hear everyones views before deciding which way to go
- Joined
- Oct 28, 2012
- Messages
- 290
If you personally are making it specifically for your machine you should eliminate any hang ups but I have removed 3.
(The ones off ebay) off 2 TAFs and a Funhouse. They run really slow and hangup around the scoop and pops.
I'd have a look at cliffys slot protectors for the below the drops off the wire forms
(The ones off ebay) off 2 TAFs and a Funhouse. They run really slow and hangup around the scoop and pops.
I'd have a look at cliffys slot protectors for the below the drops off the wire forms
Thanks for the suggestion. Chris did mention about the ball drops and that being a potentially sensitive area. I'll take a look into it.
Of course the top of the playfield is probably a long way down my list of jobs. First task is to get the cleaning compound removed then i'm going to sand the back down, clean the inserts and then start the rebuild of the underside of the playfield. GI strings are the first thing I need to refit.
Of course the top of the playfield is probably a long way down my list of jobs. First task is to get the cleaning compound removed then i'm going to sand the back down, clean the inserts and then start the rebuild of the underside of the playfield. GI strings are the first thing I need to refit.
- Joined
- Oct 28, 2012
- Messages
- 290
Wire wool for underneath
Hair dryer toothbrush elbow wax and patience for the surface
Hair dryer toothbrush elbow wax and patience for the surface
Times a bit short at the moment but last night I managed to dig out the light boards and give them a good clean up. They went from this.
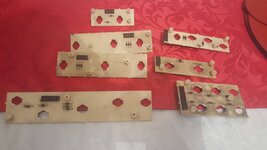
To this.
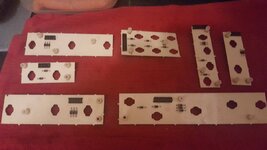
I used the method PeteB recommended. A quick spray with Ciff Actifizz and then some gentle agitation with a soft painbrush. It cleaned off the dirt with ease and then just a quick rinse under warm water before leaving them to air dry. It's going to be ages before they have power run through them so they'll be well and truly dry by then.
I also took the time to work out what LEDs I need to fit as I had a mixture of incandescent and various different LEDs installed previously. This time around i'm going to go for colour-matched superbrights for pretty much all of the inserts.
Not sure if i'll get the bottom of the playfield cleaned and the inserts polished up before I head away on holiday. Darn real life getting in the way of pinball.

To this.

I used the method PeteB recommended. A quick spray with Ciff Actifizz and then some gentle agitation with a soft painbrush. It cleaned off the dirt with ease and then just a quick rinse under warm water before leaving them to air dry. It's going to be ages before they have power run through them so they'll be well and truly dry by then.
I also took the time to work out what LEDs I need to fit as I had a mixture of incandescent and various different LEDs installed previously. This time around i'm going to go for colour-matched superbrights for pretty much all of the inserts.
Not sure if i'll get the bottom of the playfield cleaned and the inserts polished up before I head away on holiday. Darn real life getting in the way of pinball.
Been a bit slow round here of late due to us having a holiday to Spain.
Back to it now. Slow progress but i've managed to get the polishing compound all cleaned off the playfield.
I've also ran the orbital sander over the rear of the playfield just to tidy it up in places; i've not gone crazy with it because there's some minor damage to certain parts of the playfield and the last thing I want to do is catch it and lift more of the ply up. The main objective was just to get rid of the worst of the grime.
I've also gone over all the inserts and cleaned them using q-tips and glass cleaner.
I'm just about at the point now where i'm ready to redo the GI bulb holders. I got some suitable wire from the USA but I need to do a test using the staple gun i've got; it's got a fair bit of welly behind it so the last thing I want to do is damage the playfield redoing the GI. I'll most likely have a test over the next day or two and see how it goes. Once the GI is done then it should be full steam ahead.
Looking forward to seeing this complete  .
.
Me too. It'll be a while though. I can't match the incredible pace of @ronsplooter and @PeteB 
Still, we'll get there in the end.......
Still, we'll get there in the end.......
Been quiet around here lately but we're gearing up to get moving.
Picked up the Roman PDI glass tonight from @Monkeyboypaul in Riccall. I've also taken delivery of some wire needed to redo the GI strings and some new bulb holders. Stapler should arrive next week along with 6mm and 8mm length staples; then we can finally get cracking. Hoorah!!
Picked up the Roman PDI glass tonight from @Monkeyboypaul in Riccall. I've also taken delivery of some wire needed to redo the GI strings and some new bulb holders. Stapler should arrive next week along with 6mm and 8mm length staples; then we can finally get cracking. Hoorah!!
Had some problems at home of late and it's unfortunately delayed things somewhat.
However, just to give a small update i've managed to get the majority of the GI bulb holders back in place tonight. It's been a bit of a faff as I hadn't banked on the strength of the drive on my electric staple gun; it's certainly a lot more heavy handed than the cheapo spring-powered one I had previously. I can also see why a pneumatic stapler is a better option as it gives more control over how much power it drives the staples with.
However, with all that said i've managed to get the sockets in place and the wire connecting some of them soldered and secured with staples. Just the slings to do tomorrow night and then I should be able to get moving a little more.
Once the bulb holders are in place i'll most likely clean up the wiring loom and get that refitted. Time is short so the plan after that is to take a mechanism each night and strip it, clean it and then refit it to the underside of the playfield. It's going to be a while but i'll hopefully be done some time in Q3/Q4 this year. We'll see.
More pictures to follow tomorrow.
So, i'm ready to start getting stuff on the back of the playfield and i'm realising the problem with leaving it so long.
It seems that the notes I made regarding hex screws and where they come from have gone missing, and of course there are quite a few different types. The heads are generally the same size but the thread pitch and screw length varies.
Anyone on here able to tell me the length of hex screws used for holding the light boards in place on a DE table please?
Thanks Pete. As it turned out i'd managed to get the bag of screws for the PCB's mixed up with some other stuff hence my confusion. So those screws are now in the process of being tumbled, but the advice Pete gave me was excellent and a great way to differentiate between the various types of screws.
I redid the GI a little while ago but never got round to posting photos. So here's a couple of my work. I rigged up a test power supply so I could verify everything was working as expected.
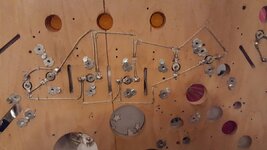
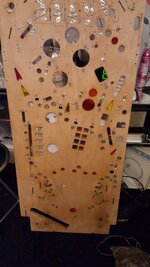
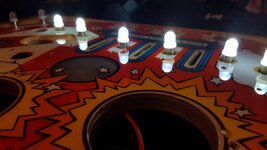
I have a few comments for anyone thinking of having a go themselves.
1. I found that the electric powered stapler I got was really really powerful. In fact i'd say if there was any issue i'd say it was too powerful and because it's electric there's no real way to reduce the amount of power. Of course with a pneumatic stapler you can easily reduce the power by reducing the output from the compressor. So in that respect I can see how air-powered might be the better option.
2. The stapler has a safety catch on it's nose which has to be fully depressed to fire a staple. This caused an issue on more than a few occasions because of the variance in height between the playfield and the bulb olders.
3. The wire I got from Pin Restore is totally different from what was used originally. It works just fine but I found that if you staled near to a cut end then it would pulverise the cable to bits. I realised very quickly that the solution was to staple down first and then clip to the required length. If I was starting a new run i'd deliberately leave a few inches of excess to trip once done.
So, it's done now. Not quite as tidy as i'd have liked but not bad either. Looking forward to getting the light boards back in place next and then a quick clean of the loom and that can be transferred back.
I redid the GI a little while ago but never got round to posting photos. So here's a couple of my work. I rigged up a test power supply so I could verify everything was working as expected.


I have a few comments for anyone thinking of having a go themselves.
1. I found that the electric powered stapler I got was really really powerful. In fact i'd say if there was any issue i'd say it was too powerful and because it's electric there's no real way to reduce the amount of power. Of course with a pneumatic stapler you can easily reduce the power by reducing the output from the compressor. So in that respect I can see how air-powered might be the better option.
2. The stapler has a safety catch on it's nose which has to be fully depressed to fire a staple. This caused an issue on more than a few occasions because of the variance in height between the playfield and the bulb olders.
3. The wire I got from Pin Restore is totally different from what was used originally. It works just fine but I found that if you staled near to a cut end then it would pulverise the cable to bits. I realised very quickly that the solution was to staple down first and then clip to the required length. If I was starting a new run i'd deliberately leave a few inches of excess to trip once done.
So, it's done now. Not quite as tidy as i'd have liked but not bad either. Looking forward to getting the light boards back in place next and then a quick clean of the loom and that can be transferred back.
So, I finally made some progress and got a few more bits in the tumbler.
Tonight i've refitted the playfield pivots and the metal slides which sit at the rear of the playfield. I also got all the light PCB's fitted back in place and transferred the loom back into place.
I've also managed to refit a few of the rollover switches. Alas no pictures as yet because the lighting in the room I was working in was abysmal. I'll try to get some pictures tomorrow night instead.,
Obviously the next task is to secure any bulb holders or other assemblies that were connected to the loom. Once that's done I'll most likely solder the GI power cables back in place. After that I can start to clean up the various mechs and refit them one by one.
I sat down last night and stripped all of the mechanisms down so I could get all the various smaller bits tumbled.
A few hours later and I was left with this.
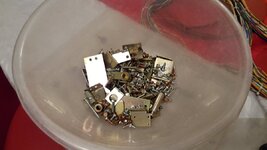
So, in the tumbler it goes. Of course i'm left with a number of larger parts which are too big for the tumbler so i'll have to give them a good clean up by hand.
I also need to get an order in for various other bits including a flipper rebuild kit, new spoons for the pop bumpers and whilst i'm going the whole hog I might as well get new skirts as well. Plenty to be keeping me busy.
A few hours later and I was left with this.

So, in the tumbler it goes. Of course i'm left with a number of larger parts which are too big for the tumbler so i'll have to give them a good clean up by hand.
I also need to get an order in for various other bits including a flipper rebuild kit, new spoons for the pop bumpers and whilst i'm going the whole hog I might as well get new skirts as well. Plenty to be keeping me busy.
Nice to see this being done so well, and you're going right down to the details of buying new spoons and skirts. I dont think most people realise how easily worn those 2 things are, and it's not especially obvious to see when you take them apart.
But when you put new ones in, and it's all aligned correctly, the pop bumper action is super snappy! Like a new Stern
But when you put new ones in, and it's all aligned correctly, the pop bumper action is super snappy! Like a new Stern

Cheers Peter. My view on it is that if i've taken the time that I have to get this far then it seems crazy to scrimp on a few relatively inexpensive spares.
And of course the old parts are carry years of crud and dirt on them so in many cases it's easier just to buy new than try to clean them.
And of course the old parts are carry years of crud and dirt on them so in many cases it's easier just to buy new than try to clean them.
Well, the tumbler has been running for a few days now. Unfortunately the process is quite slow for me because I don't have a seperate workshop so the tumbler is actually in the house and it generates a fair bit of noise. For this reason i'm only really running it during the day from 08:00 until 19:00 so naturally that means that things take a little longer.
None the less, the results are pretty nice.
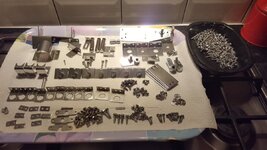
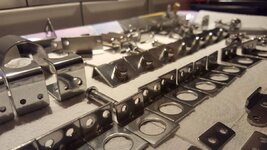
There are a couple of larger plates shown at the back in the images above and those have only been in for a couple of days so they need a bit more work. The media i've been using is getting a little old now so i've ordered some walnut grit and i'm going to put those back in using the grit and then give them another going over with the corn cob media too (as suggested by Pete B).
The screws in the black tray were the ones I hadn't cleaned yet; one of the pleasures of tumbling is that you do end up with a bit of media lodged in the screw heads, but it's no big deal and I find it quite relaxing to sit and slowly work through the piles of screws. They're all cleaned up now.
Now that the screws are all polished up i'll most likely go over the back of the playfield and reattach all of the various lamps and other elements.
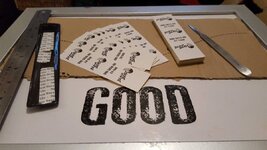
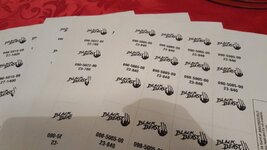
I've also taken some time to go through all of the mechanisms to confirm the coils are the correct ones. Thankfully they are all fine. Whilst checking I also made up a list of what coil wrappers I was going to need and i've now printed those off. Nice and simple for this DE table as they're all just printed on white adhesive backed paper.
I'll most likely go through the pop bumper parts tonight and dig out the plastic components so I can get those cleaned up. Other than that things might be on hold a little until the walnut media turns up.
None the less, the results are pretty nice.


There are a couple of larger plates shown at the back in the images above and those have only been in for a couple of days so they need a bit more work. The media i've been using is getting a little old now so i've ordered some walnut grit and i'm going to put those back in using the grit and then give them another going over with the corn cob media too (as suggested by Pete B).
The screws in the black tray were the ones I hadn't cleaned yet; one of the pleasures of tumbling is that you do end up with a bit of media lodged in the screw heads, but it's no big deal and I find it quite relaxing to sit and slowly work through the piles of screws. They're all cleaned up now.
Now that the screws are all polished up i'll most likely go over the back of the playfield and reattach all of the various lamps and other elements.
I've also taken some time to go through all of the mechanisms to confirm the coils are the correct ones. Thankfully they are all fine. Whilst checking I also made up a list of what coil wrappers I was going to need and i've now printed those off. Nice and simple for this DE table as they're all just printed on white adhesive backed paper.

I'll most likely go through the pop bumper parts tonight and dig out the plastic components so I can get those cleaned up. Other than that things might be on hold a little until the walnut media turns up.
The cut lines are just the ones that are on the wrapper files that I downloaded from the Pinball Rebel website.
I've just printed them using an inkjet onto some adhesive backed A4 white paper. Nedreud actually did a fairly detailed guide on the process here, but unfortunately I can't give a link to the paper I used as the seller on eBay no longer seems to have an online store.
I recall that when I did the knocker coil it was a bit of a pain in the backside to get the wrapper to go on without wrinkling so i'll be using the scalpel to chop a few of these so I can play around with different methods. One option is to first do a masking tape wrap so that you've got a tidier base to work with, but the other idea i'm going to try is only removing the adhesive backing at either end. It might help make it go on a little more neatly.
A general question to people following this log.
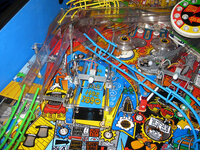
As it comes to rebuilding the pop bumpers i'm debating if I should changed the wafers to red or orange instead of the stock white.
Thoughts people?
 RB007 by arcaderuss, on Flickr
As it comes to rebuilding the pop bumpers i'm debating if I should changed the wafers to red or orange instead of the stock white.
Thoughts people?
 RB007 by arcaderuss, on Flickr
A general question to people following this log.
As it comes to rebuilding the pop bumpers i'm debating if I should changed the wafers to red or orange instead of the stock white.
Thoughts people?
RB007 by arcaderuss, on Flickr
Looking at that photo I would say your wafers (pop bumper skirt
What I've started doing lately is changing the pop bumper bodies from the stock white, to a clear coloured one which matches the bumper cap. It's a subtle thing but seems to look neater and also lets light fom the LED pass through. Usually leave the skirt standard white or black, but I'd like to see what it looks like colour matched.
Things have come to a bit of a halt whilst I wait on some parts to be delivered. I'm also seriously considering buying a sheet of .75mm lexan and making a custom playfield protector similar to the one Nedreud did.
The lexan itself is pretty cheap at only £20 for a full sheet so I figured at that price it's worth a go. If it doesn't work as expected or i'm not happy with how it plays it's not such a big job to strip it off, but it really does need to be made before I get too much back onto the rear of the playfield.
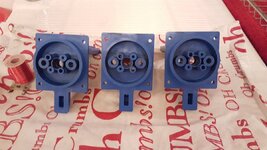
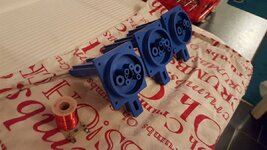
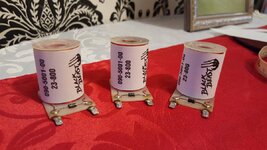
So, whilst I waited for the bits to arrive in the post I stripped down the bumper mechanisms, cleaned the coils and re-wrapped them. Much more tidy now. I found it's really easy to wrap them if you just trim off the adhesive backing on either end and leave the mid-section covered.

Haha, note to self. Photos are all well and good but the scale can sometimes really throw you off.
I've been rebuilding pop bumpers tonight and could have sworn i'd grabbed the right screws; only to then find the nylocks were too big to fit and the screws didn't fit into the upper bracket either.
A bit of deduction and I eventually tracked the right parts down. No photos tonight as i've got a bumper spring to try to track down; no idea where that's vanished to.

