What's new
Pinball info

Register a free account today to become a member! Once signed in, you'll be able to participate on this site by adding your own topics and posts, as well as connect with other members through your own private inbox!

Complete Pinshack and workshop build

Last job for this weekend as it's NERG!!! joists and noggins all fitted for the other half of the floor. Can't do any more for now anyway as apart from NERG this weekend the timbers are soaking form the rain we have had, so need to let them dry out before fitting insulation batts and P5 chipboard.

Cheers

kev

IMG_2230.JPG
 
Update guys - been very very busy. had a week off last week and worked pretty much none stop on the shed, so here is a series of the bits done and some pics.


Day 1 french doors where fitted and trimmed with hardiplank edge trim all around them, and also to the window prior to planking.
IMG_2240.JPG IMG_2239.JPG

Day 2 we planked the whole back of the shed.

IMG_2241.JPG

And day 3 the last remaining side was planked(one cut to do to finish the top edge off)

IMG_2238.JPG


Day 4 we started on the front and got it all done in the day

IMG_2242.JPG IMG_2243.JPG IMG_2247.JPG
As you can see the cork was popped(and caught in the photo!!) to celebrate the outside being complete!!

And here is a shot of the finished front
IMG_2256.JPG

Day 5 & 6 thought we would have a day of rest - so went to matts and fitted a ensuite floor, shower cubicle and toilet !!!

Day 7 started on the ceiling - horrible job - filled the cavity with 100mm rwa45 rockwool batts so as to leave a 50mm air gap over the top to ventilate roof
IMG_2270.JPG IMG_2267.JPG IMG_2269.JPG
Yes we had to wear some very interesting outfits to put the RWA45 up into the roof !!!


And finally the ceiling was complete - took 2 days just to fit 9 boards!!! lots of holes to cut for wires and every board needed to be cut as well
IMG_2271.JPG IMG_2272.JPG

So that's it for now folks!!! Back to work this week for a rest!!!!

Cheers

Kev
 

Attachments

  • IMG_2256.JPG
    IMG_2256.JPG
    157 KB · Views: 12
Looks brill Kev, that hardiplank stuff really finishes it off.

Nearly there now ! :D
 
Cheers guys - yes its not the cheapest stuff but by far the best and it does look really smart

Kev
 
Did a bit last night - put some insulation in the walls ready for boarding one end over the weekend coming. 50mm rockwool batts in here with a 50mm air gap behind them.

Also filled all the screw heads and joints in most of the ceiling as well. Doesn't look too bad. A quick sand over and paint and I think it will be acceptable

IMG_2274.JPG


Cheers

Kev
 
Hi guys, bit more progress, been off line for a couple of days due to man flu so not had time to do any posts, so here we go!!

Started to board out the workshop end with the intention of then building the dividing walls so the pins can be stored in there whilst I do the pinshack end.
IMG_2283.JPG
Front side wall done up to the dividing wall area

IMG_2287.JPG
Rear wall insulation in 50mm going in here with 50mm air gap behind as per usual

IMG_2288.JPG

rear wall boarded

IMG_2291.JPG

finished end - used lightweight screwfix filler for all the screw heads and joints - gotta say great to work with and no shrinkage or cracking. will just a quick rubdown when ready to decorate.

IMG_2292.JPG

dividing wall build between workshop an pinshack

IMG_2299.JPG

next bit was to get the pins from the house into the shed!!! I loose laid some paving stones and put two 4x2 railway tracks down for my trolley

IMG_2300.JPG
as you can see not much room for error and very precarious !!!

one pin on its way down!!
IMG_2301.JPG

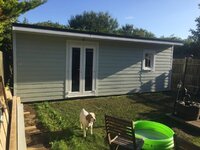
she was just posing I did all the graft!!!! we only fell off the rails once and no harm was done phew!!!

and finally all the pins in the new storage space for now
IMG_2302.JPG

and last job was board this side of the wall until I ran out of plasterboard!!!

IMG_2305.JPG

That's it for now folks!!! tune in for the next installment to see the pinshack take shape!!

cheers

kev
 
Looking good Kev, that rail system certainly looks like a bit of a test :D.
It sure was Kev!!!! very slow moving but it worked a treat - slid them onto the trolley out of the conservatory (in the pic) and then they just slid into the shed off the trolley!!! Front of shack will be getting all decked eventually to make pin movements a lot easier!!!

Its weird since we moved into the house, the conservatory has been rammed with gear - we now have a new room that we haven't really seen before until last weekend and its huge!!!

Hope you are on the mend bud

Cheers

Kev
 
Cheers Kev, out of interest what are you going to use your conservatory for now? Mine is full of pins after fitting solar reflective inserts in the roof and roof blinds. Before then it was way too hot to do anything in there in the summer and too cold in the winter. I think most people don't use their conservatories because of the heat problems. A friend of mine just finished bricking up 2 walls of his and fitting a proper roof as they never used it because of said problems.
 
Cheers Kev, out of interest what are you going to use your conservatory for now? Mine is full of pins after fitting solar reflective inserts in the roof and roof blinds. Before then it was way too hot to do anything in there in the summer and too cold in the winter. I think most people don't use their conservatories because of the heat problems. A friend of mine just finished bricking up 2 walls of his and fitting a proper roof as they never used it because of said problems.
Now we have it as a space we are not sure yet - we are already thinking of replacing the polycarb roof with a proper roof, but as for the future of it not sure . Original plan was to pull it down and add full width garden room/kitchen extension across the back, but we have seen the size of it(15x12) we are having a rethink!!

Cheers

kev
 
Did it all in about 5 hours Kev, once you get the hang of it they go in quite quickly ( don't forget a bit of the lubrication first ).
 
Did it all in about 5 hours Kev, once you get the hang of it they go in quite quickly ( don't forget a bit of the lubrication first ).
Hmm may consider that - soI guess you take the bottom sealing strip of and just shove it up - does it all lay flat ??? and how do you re-seal ?

Cheers

kev
 
Yes you remove the bottom seal/breather tape and replace with new usually sold by the same place that sells the insert. You punch a small hole near the end of the tape, insert a plastic rod with a split in the end into the hole and shove it up through each segment of the roof with the rod. It sits in a U shape not flat.

You can see the breather tape and plastic rod for sale on that ebay link.

Here's a more expensive version ( probably exactly the same stuff )

https://www.polycool.co.uk

 
Last edited:
Yes you remove the bottom seal/breather tape and replace with new usually sold by the same place that sells the insert. You punch a small hole near the end of the tape, insert a plastic rod with a split in the end into the hole and shove it up through each segment of the roof with the rod. It sits in a U shape not flat.

You can see the breather tape and plastic rod for sale on that ebay link.

Here's a more expensive version ( probably exactly the same stuff )

https://www.polycool.co.uk

Cheers Kev thanks for the info
 
more progress this weekend. Boarded the rest of the pin room side. Run out of filler so still a bit to do except far right corner as this is the sauna and the walls get cladded in finnish pine!!

IMG_2309.JPG
IMG_2310.JPG

And then finally built the stud framing ready for the sauna. Note the space on the left of it - strange how a pin will fit there perfectly !!!

So now nearly ready for decorating and flooring down and the 2nd fix electrics yippee!!!! light at the end of the tunnel - or there will be when I hook all the leccy up !!!

Cheers

kev

EDIT - Would of helped if I had put the pic in lol!!!

IMG_2311.JPG
IMG_2312.JPG
 
Last edited:
More work on the pinshack this weekend. Ceiling now all filled and painted and. 2nd fix electrics going in. Took me ages to put the nine downlighters in!!! walls all primed ready for the top coat this week. All the dry lining back boxes are in and the laminate flooring purchased so getting close now. Funky Led emergency exit sign as well!!! purchased the wrong one as I thought it was a bulkhead one but hey ho I think it kind of looks quirky lol !!!

The two cables left are for a smoke alarm and the single centre on is going to be for my infinity starscape fitting!!

Cheers

Kev

IMG_2314.JPG IMG_2315.JPG IMG_2316.JPG
 
That exit sign is just the job. Please pass my thanks to Tony Bliar for requiring that we install such things

Allergens - This fish pie contains fish
Allergens - This nut roast ontains nuts
Warning - This fire can become hot etc etc etc
 
That exit sign is just the job. Please pass my thanks to Tony Bliar for requiring that we install such things

Allergens - This fish pie contains fish
Allergens - This nut roast ontains nuts
Warning - This fire can become hot etc etc etc
Haha!!!! Cheers man

Kev
 
looks superb!
Cheers Neil starting to get there - hope to have all the walls finally painted this week and get the flooring down at the weekend in the pinroom and then its only back moldings and skirting and then onto the workshop and sauna rooms!!

Kev
 
i'm looking like I need to go the planning route, but trying to find ways of avoiding that as one of my neighbours I know will complain like an essex boy in the back of a cop van.
 
Back
Top Bottom