OP
OP
And after the torrential downpour today I'm pleased to say all is bone dry and good!!!!

Cheers man - coming on nice, but slow moving now as putting all the wiring in, and there's lots of it!!! Fitted the window at the weekend will upload some pics soonLooking good! Normally I'm 100% against flat roofs but homework done on this one, you have my blessing! ha
Cant wait to see it finished


Cheers Kevlar!!!!Coming along nicely Kev, can't wait for the opening party
cool man no problems just shout if you need any adviceThis is looking awesome.
Thanks for doing such a detail thread on it, I'm taking inspiration from this and copying a lot of the build methods with my pinshed.
Haha!!!! sure will Astyy cant't wait but its a few months off yetEnjoying this log too, and the best thing when this is finished you'll be back to machine shop logs I hope
I'm missing brushing Bigfoots teeth and the meths lab among other of your shop log highlights.


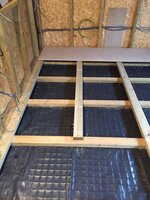
") On with that tonight
On with that tonight 

![IMG_2222[1].JPG](https://www.pinballinfo.com/community/data/attachments/48/48057-e766c013e6049bac0ff9e04e9dbc8916.jpg "IMG_2222[1].JPG")
Hi Pete,Loving this build @newdos! I so wish I'd seen this before I bought my pre-cut summerhouse kit, particularly the plastic grid base. What's the rough final cost going to be for materials?

Cheers man!!!Looking great pal.....
I think it will be over 5k(excluding all the kit for the sauna that is going in there, but I have included the cost of the partition walls for it and plasterboard, electrics etc) but hopefully not by much. I reckon by the time this is finished a commercially bought one would of been easily 20k - so I'm happy!!!So should come in at under £5k?
Nice going. I'll keep that in mind when pricing up our move.
The wife wants my 'crap' out of the house so it's either going into a converted shed or i'll have to put a building in the garden for it. Something like this would be lovely.
to be honest i wanted a 26ft x 10 ft but that would have caused me a few problems so 16 ft x 10 ft it was ,i shall be following this along well done .Cheers @blackie63that is so fantastic in many ways and doing it yourself brilliant if only i had the room (skill set )
Yes mate the hardieplank is 3 times the price, looks very nice, totally fireproof, very hard wearing and no shrinkage cracking etc like timberTimber might have been a cheaper option but i'm loving the look of the hardiplank and I suspect it'll be a lot more hard wearing.
Great work - i'll be watching your progress with interest.


Pleasure and thanks manI am in awe of the skills of some people in this group. Although I know I could never aspire to building something like this it is fascinating to watch other people's progress. Thanks for sharing.