What's new
Pinball info

Register a free account today to become a member! Once signed in, you'll be able to participate on this site by adding your own topics and posts, as well as connect with other members through your own private inbox!

My Life With An Ex-Arcade TAF

Dreads' date=' post: 1692729 said:
C'mon, I did say bit of a dawg not a total shed, just spoke my mind, no point sugar coating it as that would imply to all noobs that a machine in that condition is what they can expect when they purchase, the new owner is obviously restoring it and bringing it back to life but it was a bit of a dawg to start with
biggrin-1.png


Hmmm true ....but I figure if a 'noob' sticks around in the pinball world they will in time realise the condition of their first purchase, whether good or bad.


I just think there are more diplomatic ways to go about pointing out any 'flaws'
wink-1.png


As we all know its total luck of the draw on first purchase ....and it works both ways .... my first machine was Tommy, turns out it is one of the nicest around ..... I had *NO* idea when I bought it. To me it was a pinball that lit up and you can play ....that was all I needed to know.
 
Lol, did not have my diplomacy head on when I posted :eek:


To be fair I think it's more to do with the title than anything else, TAF is top of the noob 1st pin list but as we all know mint TAF's are a rare beast and most have chair hole wear etc, so maybe a noob should expect a bit of a dawg if purchasing a TAF as a first pin
biggrin-1.png
 
I took it as a knock to start with, I was looking for advice and encouragement but I have a pinball machine and get to play it every night which gets me over any pain.
wink-1.png
Plus I would have been scared to damage a perfect one so at least I feel like I can't hurt the old Dawg. In my investigations I keep coming across a quick fix or bodge that I am putting right, whilst the playfield and cab won't ever be perfect, it might as well at least play right.


Over the last week I have rebuilt the bottom two flippers with including bushes (thanks for the tip) plus fitted orange coils and reconnected the EOS switches that were disconnected. New top right flipper has gone on and a partial rebuild because I keep forgetting that bushes are not part of the rebuild kit. That is now running a red coil not the orange one it had on it.


I realised my first attempts to strip it down and clean it were pathetic and so started yesterday having another go. What was the worst I could do to the dawg.

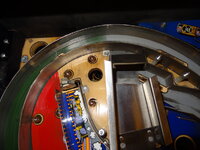
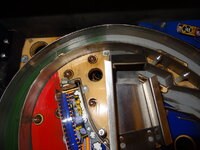
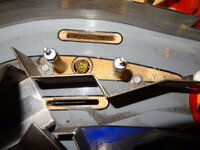
First some dirty shots:
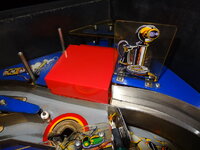
DSC01608-1.jpg


DSC01612-1.jpg


DSC01612-1.jpg


DSC01617-1.jpg


This was pretty much as far as I was going to get in the time I had:
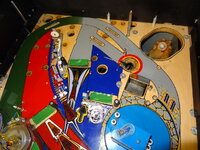


DSC01628-1.jpg


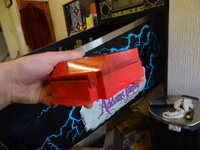
Things Box was nasty:


DSC01630-1.jpg


But came up nicely (that is my hand and not Thing themself)
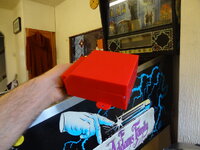


DSC01631-1.jpg


Looking a bit better:


DSC01636-1.jpg


I was talking to Paul at the Slam about GrizZ' Addams and saying how much lighter it looked than mine, especially around and under the ramps. Paul said that there were clear ramps like GrizZ' and smoked ones which were darker. Well mine was a third type, bloody filthy. But it cleaned up nicely though has a few cracks as I would expect on an ex-arcade machine.
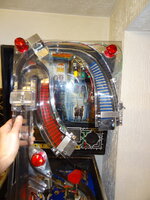


DSC01610-1.jpg


I also received some new slingshot plastics as Gomez was in peices but I can't say I am happy with them, the new ones are a cheap scan of the originals, the definition is awful.
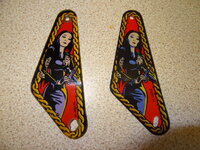


DSC01638-1.jpg


If anyone has a NOS Gomez then please let me know.


So it still has wear and tear on the playfield but maybe I would tackle a playfield swap if a better one came up, for now I am happy that it is cleaner.
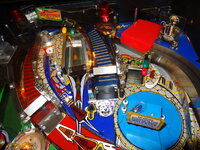


DSC01641-1.jpg


The bottom right half was done as well but I didn't get pictures, the jets area were done the other week. I need remove some bits underneath as well as the return ramps was filthy.


To celebrate, I gave the old dawg some new balls to play with. I also put a blue cover on light under the blue ramp which I really like but didn't seem to get a picture of that.


From the pictures, let me know if you see something that is wrong or that I should consider.
wink-1.png
 
Oh, before anyone points it out. I need to decorate the kitchen at some point.
biggrin-1.png
 
For sure your TAF has had a lot of games played on it, but hats off for doing what you have done:D


I have never ever attempted to take that much stuff off a playfield as I know it would never ever go back together again!
 
It's amazing what a bit of cleaning can do....nice work
smile-1.png
Are you going to replace the bookcase base plastic, looks like its got s few cracks in it?
 
You might also want to take the ball lane metals off and give them a going over with some fine wet'n'dry (or a pad on a drill). It will get rid of any ball marks and make it nice and shiny again
biggrin-1.png
 
Yep cleaning can really help - even a quick one - ask anyone who saw my Spirit after a quickie clean


Ramps look good after 30 mins in dishwasher - best way methinks:rolleyes:
 
Yup, you will make a good techie, was a self employed computer technician doing onsite repairs for a while, that was only possible after years PC headf**ks in the preceding years, if it don't break you don't learn!!, keep going as you have a great opportunity to learn a shed load of info really quickly on that machine, it's all down to perspective;).
 
I do have a new book case plate but the Missus wants a patio so I am waiting before I strip it down as it looks complicated.

The metal ramps were cleaned but the wear shows still, I don't think I will get away with putting them in the dishwasher, she flipped when she found parts of a car engine in the cooker.
rolleyes-1.gif
 
You could also give your plastic ramps a quick flaming with a heat gun or blow torch (I use the torch) this will remove some of the surface scratches and adds a bit of shine, obviously care is needed as these things will go out of shape if you over do it, maybe experiment with an old scrap ramp first to see what you can get away with before it distorts.
 
Interesting idea, which I can see going badly wrong. Just the sort of thing I like doing.
smile-1.png


So, I guess quick stroke to get it warm but not get it so hot it distorts? Does anyone have any scrap ramp they want to send me, I will pay postage?


As for sanding the metal ramps, any other tips? Wet and dry sandpaper, wetted and not too much in one area? I do have a dremel which I was going to give a go, it had a work out on the legs with some autosol but I didn't like the final finish as it was duller than I expected.


I think I will do the bookcase next, my eyes are drawn to it but I don't have time for a few weeks.
 
I always find after giving things a good clean that the ball acquires loads of spin and behaves like crazy especially around the flippers - it's sometimes like Power is switched on!
 
That is a great demo DrPinball, thanks for that. I was getting worried as I was thinking more like this:


I use a portable soldering iron and have those attachments so will give it a go.
smile-1.png
 
Calimori' date=' post: 1692737 said:
I was talking to Paul at the Slam about GrizZ' Addams and saying how much lighter it looked than mine, especially around and under the ramps. Paul said that there were clear ramps like GrizZ' and smoked ones which were darker. Well mine was a third type, bloody filthy. But it cleaned up nicely though has a few cracks as I would expect on an ex-arcade machine.


Mine actually doesn't have clear ramp, it is the standard 'smokey joe'. I fully intend on putting clear ramp in there one day when i can spare the £££'s
rolleyes-1.gif
And on my TZ ...one day.


But it is pretty clean, which as you have found makes a huge difference. Your TAF is starting to look sweet - nice work soldier :cool:


I have added a few extra lights around the playfield which helps, and I think it needs them, I like to play my machines in low lighting and TAF is a dark machine.


Off top of my head ...


Spotlight near upper flipper to illuminate bookcase.


Green LED in swamp area.


Extra lamp mounted behind the 'Kick bear' sign on the ramp.


I think there are 2 extra lamps added under the plastics on the left side, by the pops and slightly further up. This is the darkest area of the game.


LEDs used under 'Lock' inserts and Thing insert - just to make em pop out a bit more.


Don't forget to give the undersides of inserts a good clean, windowlene or foaming cleanser and small paint brush/toothbrush etc - sometimes they can be black with dust. And clean the bulbs too if they coated in soot.


cheers
 
Calimori' date=' post: 1692758 said:
As for sanding the metal ramps, any other tips? Wet and dry sandpaper, wetted and not too much in one area? I do have a dremel which I was going to give a go, it had a work out on the legs with some autosol but I didn't like the final finish as it was duller than I expected.


I think I will do the bookcase next, my eyes are drawn to it but I don't have time for a few weeks.


I personally never bother with trying to regrain ball guides. Yeah they look nice but the ball marks/trails will *always* come back if you play the table much - metal on metal. A good clean and shine does me.


Enjoy changing the bookcase base...its a lot of *fun* :eek::mad:
rolleyes-1.gif
<grabs stiff drink just thinking about it>
 
Calimori' date=' post: 1692763 said:
That is a great demo DrPinball, thanks for that. I was getting worried as I was thinking more like this:


I use a portable soldering iron and have those attachments so will give it a go.
smile-1.png

That is Sgt Grizz (rear) and his mate just spotted a TOM
biggrin-1.png
 
Some people asked me why I didn't buy a Demo Man, my response is Wesley Snipes. I couldn't live with him looking at me like that.


I have a lot of cleaning underside to do and the lenses will all be part of that, most of the bulbs have been lined up correctly and changed now.

GrizZ, how did you wire the extra lamps in? Do you use original bulb holders or are their special kits? I might just ask Dreads for a bulk load of mods but at the moment it is fixing and replacing not modding, as modding gets expensive with me.
rolleyes-1.gif
 
Calimori' date=' post: 1692770 said:
Some people asked me why I didn't buy a Demo Man, my response is Wesley Snipes. I couldn't live with him looking at me like that.
rolleyes-1.gif

Enjoyed Sandra looking at me while I owned mine.
 
Calimori' date=' post: 1692770 said:
I have a lot of cleaning underside to do and the lenses will all be part of that, most of the bulbs have been lined up correctly and changed now.

GrizZ, how did you wire the extra lamps in? Do you use original bulb holders or are their special kits? I might just ask Dreads for a bulk load of mods but at the moment it is fixing and replacing not modding, as modding gets expensive with me.
rolleyes-1.gif


No special kit .....just use suitable bulb holders daisy chained onto a nearby GI string. 1 or 2 extra lamps on a string shouldn't cause too much strain on the game. I have an old wiring loom from a scrapped game that will keep me in spare wire for eternity.
 
Calimori' date=' post: 1692758 said:
Interesting idea, which I can see going badly wrong. Just the sort of thing I like doing.
smile-1.png


So, I guess quick stroke to get it warm but not get it so hot it distorts? Does anyone have any scrap ramp they want to send me, I will pay postage?


As for sanding the metal ramps, any other tips? Wet and dry sandpaper, wetted and not too much in one area? I do have a dremel which I was going to give a go, it had a work out on the legs with some autosol but I didn't like the final finish as it was duller than I expected.


I think I will do the bookcase next, my eyes are drawn to it but I don't have time for a few weeks.

3M Scotch pads are great for cleaning up metal ramps and lane guides.
 
replicas' date=' post: 1692777 said:
3M Scotch pads are great for cleaning up metal ramps and lane guides.


Green Scotchbrite. I can do a metal ball guide in about 2 minutes with one of those. Gives it the correct 'grain' finish too. Then a wipe down with Novus 2.
 
Did you clean the Thing hand when you had the back off ?


If not you can remove it from underneath. There is a neat trick where you fill in the plastic between the thumb and first finger with black marker and it gives the hand a lot more definition. I did it to mine and like the effect.
 
Thanks for the scotch pad tip for the ramps, I have Novus and used that last time so they are clean at least.

I didn't clean his hand, thinking I was going to remove the lot from below
sad-1.png
. I think I should be able to remove the top of his box and use the test utility to open his hand and give him a bit of a clean, though I was digging the grotty look, it makes him look like a corpse.
wink-1.png


I tried the blow torch idea quickly and can see the benefits from the local test area so will do the whole thing when I have time.


Good link Andrew, I will have a read as it always helps when some else posts about it. For any future lost soul who is traveling on the same path, I have loads of pictures as I record as much as possible when I take any machine apart.
 
If you haven't done so already mate, make sure the ramps are as spotlessly clean as possible, or any bits of muck will be forever entombed in your ramp like a fossil!!
 
Back
Top Bottom