A little update for everyone, I have put the connectors on the MPU and put the old chips in, as the stuff has arrived from RS (although waiting on a bit from MyPinballs), I am getting locking on LED's now, still no display... I am hopeful on new connetors and ROM's but surely I wouldn't be getting no displays because of this...
Pinball info
You are using an out of date browser. It may not display this or other websites correctly.
You should upgrade or use an alternative browser.
You should upgrade or use an alternative browser.
In Progress Laser Ball - Williams
- Thread starter James
- Start date
You are heading in the right direction. It may feel like a step backwards but any battery crud left on the board will keep eating away at the copper traces and components causing issues down the road.
Nothing worse then the satisfaction of fixing a game only for it to break again a week later with a totally new problem. A look at the skills you have tried along the way.
Make sure all the chips are seated proper and buzz through from the should of the legs to the next point on the board. This way you know things are good. If a chip pin goes to another seperate chip pin buzz shoulder to shoulder.
Regarding the displays have you checked the 90v from the power supply board and are the power connectors for the displays plugged in as they can be seperate from the main plugs connecting the displays to the display driver board. Look for a brown cable daisy chained with 4 or 5 single pole connectors.
OK - once again @Moonbus to the rescue!!!!
So I have gone through all of the shoulders of the chips and found what does buzz an what doesn't, also checking for any shorts either side of the pin... This led me to find a few errors with my soldering skills as well as a quick lesson from one of the guys at work, I have took my time and care with the jumper wires, the result is much better and I am confident I have actually done it right this time, I have also checked the underside of the board for any bridged soldering work and point to point for the buzz, finally all checks out, a lesson for me, do it right once, take your time. I know there is some dodgy looking soldering especially where there is the single jumper, but getting the solder onto the pads was a nightmare and beings I am getting continuity, I am not going to rework I don't think.
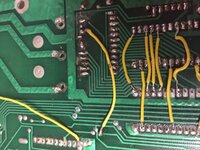
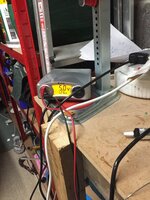
Since doing this, instead of getting 4.6v draw I am now getting the correct 5V - I still have that capacitor to change yet on the blanking segment, and I am still getting the locking on of both lights, but feel I am further on.
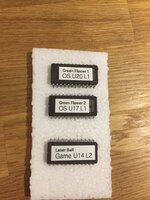
So my package from @myPinballs arrived with the green flipper ROM and the game ROM, the only thing is, there was 3 chips, not the 5 on my board, is this because I have a system 4 board that has been upgraded and I should have ordered something else?
So I have gone through all of the shoulders of the chips and found what does buzz an what doesn't, also checking for any shorts either side of the pin... This led me to find a few errors with my soldering skills as well as a quick lesson from one of the guys at work, I have took my time and care with the jumper wires, the result is much better and I am confident I have actually done it right this time, I have also checked the underside of the board for any bridged soldering work and point to point for the buzz, finally all checks out, a lesson for me, do it right once, take your time. I know there is some dodgy looking soldering especially where there is the single jumper, but getting the solder onto the pads was a nightmare and beings I am getting continuity, I am not going to rework I don't think.

Since doing this, instead of getting 4.6v draw I am now getting the correct 5V - I still have that capacitor to change yet on the blanking segment, and I am still getting the locking on of both lights, but feel I am further on.

So my package from @myPinballs arrived with the green flipper ROM and the game ROM, the only thing is, there was 3 chips, not the 5 on my board, is this because I have a system 4 board that has been upgraded and I should have ordered something else?

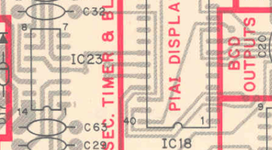
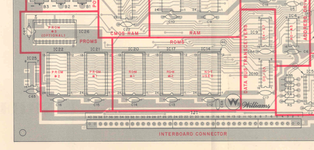
Reading up on this, and hoping I am right here, I just need to place the single ROM in IC14 and can remove all roms in the bad 3 areas highlighted that I have been working on.
View attachment 58320
Do you know what the chip type is that you were supplied for U14 (IC14)?
If it's a 2176 you should be able to drop it in U14 as you though. I have not had to deal with this so I can only pass on what the internet says. Mypinballs should be able to show you the way though. He is far wiser and more experienced then I am.
Good job on the other issues. If it's functional and nothing is going to fall off you have done well. In the future if the desire is there come back and re-work it.
You are not only fixing a pinball you are learning a life skill in soldering and trouble shooting circuitry.
Just to re-up the previous posts, I have changed the header pins and installed the new chips, as well as the capacitor, I am going to solder these onto the driver board tomorrow. To bigup @myPinballs again, the molex connectors he sent were top draw, thanks. After that I think that IC19 (5101 CMOS RAM) might be the issue, as it was out and not stored properly. As it is socketed, it might be worthwhile changing out anyway. @myPinballs as a shotgun approach, could you suggest a care package to trial with this?
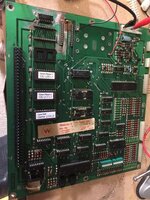
Onto the displays, I am getting the "glow" from the displays as described on PinWiki, which means I have a tonne to go at to get them up and running, the guide is ok... but I am not sure I am following it correctly, having no idea where to start on those, or is that a symptom of a dead MPU?

Onto the displays, I am getting the "glow" from the displays as described on PinWiki, which means I have a tonne to go at to get them up and running, the guide is ok... but I am not sure I am following it correctly, having no idea where to start on those, or is that a symptom of a dead MPU?
Re. the program chips - AIUI the 'personality' part of the program could've been in Proms (as you originally had) or a single Rom, along with the utility part in Green Flipper Rom's 1 & 2. The notes on this area for the similar age Gorgar state that when a Rom is used a jumper change is required (J4 changed to J3). This may also be the case for Laser Ball.
* The designations J3/J4 are for the original fitment L6 pcb. The connection made controls the hexadecimal address of IC 14 - with J3 its '6000/16', with J4 it's '6800/16'. The L4 doesn't seem to have this facility.
* The designations J3/J4 are for the original fitment L6 pcb. The connection made controls the hexadecimal address of IC 14 - with J3 its '6000/
Last edited:
So, I haven't been able to get on with this due to my MBA coming to an end, which has been great but means, no time in the evening to get on.
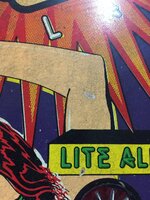
So along the line of my NF thread, I am going to need to do a bit more work on LB, as the very attractive redhead, unfortunately, has a very hairy chest (and arms for that matter)
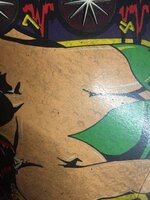
Would this be a candidate for magic eraser, or something else?
So along the line of my NF thread, I am going to need to do a bit more work on LB, as the very attractive redhead, unfortunately, has a very hairy chest (and arms for that matter)

Would this be a candidate for magic eraser, or something else?
Good job. At least you now have displays and hopefully the audit functions.This makes me very happy- mother in laws birthday today so lunch and dinner either side of football means I wont get any understanding of why a game won’t fire up, but this is a huge improvement.
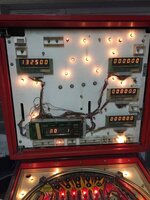
So a bit of progress today... the game has no sound, so I will have a look over the sound board when I get a second, I can get the game to fire up now and the left flipper fires perfectly, the right flipper (bottom) twitches and then tries to move upwards, if you hold the switch down, I have tested the actual mech and it moves freely, so am wondering if this is a diode issue. On the "left side" of the play field, all switches etc work, all pop bumpers, and top right flipper have nothing. I have a schematic which I will check, but I know there are some drop target solenoids off and a pop bumper completely off, so I knew that the game wouldn't "play" as it were. Still managed to get some scores up and actually, to me, the displays look nice and bright.
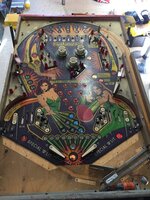
I have taken the play field completely out of the game to start to strip it back. I thought this was the best place to start and see what I was dealing with wear wise and plastics wise, actually, all of the plastics are just fine, apart from being absolutely filthy - which is actually in keeping with the game. Got it back with the majority of plastics off, to this.
I am assuming all of the GI lights on this game are the same, as they seemed to be on topside of the play field anyway, i am not sure when you make it in the pinball community, but for me, I think having my very own bag of bulbs certainly took me some way along that journey.
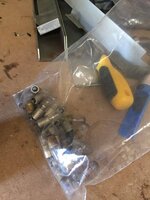
The old rubbers just reinforces the history of this game, what with the Mechano drop target hack too, this was never going to go well with these on the game was it. I can't tell if they were originally white... or black? (Excuse the potato image)
Gave the playfield a hoover, I then wanted to see what state it was underneath, I probably shouldn't have but I have heard 99.9% ISO is okay to use to bring up dirt so I had a little try... The game is just absolutely filthy, a little wear in places sure, but mainly just caked in dirt.
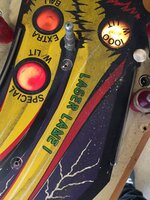
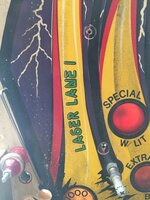
I will wait until I have some proper Novus to go at this with... but I have hope for how I can get it up, there is an amount of ball swirl, this is never going to be mint, so I will see what happens when I get some Novus on it. Will put an order into @pinballmania when he is back, in no rush really, just weighing up what is needed to be honest. Left the playfield like this, so all in all a good fun day with it.
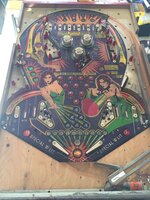

I have taken the play field completely out of the game to start to strip it back. I thought this was the best place to start and see what I was dealing with wear wise and plastics wise, actually, all of the plastics are just fine, apart from being absolutely filthy - which is actually in keeping with the game. Got it back with the majority of plastics off, to this.

I am assuming all of the GI lights on this game are the same, as they seemed to be on topside of the play field anyway, i am not sure when you make it in the pinball community, but for me, I think having my very own bag of bulbs certainly took me some way along that journey.

The old rubbers just reinforces the history of this game, what with the Mechano drop target hack too, this was never going to go well with these on the game was it. I can't tell if they were originally white... or black? (Excuse the potato image)

Gave the playfield a hoover, I then wanted to see what state it was underneath, I probably shouldn't have but I have heard 99.9% ISO is okay to use to bring up dirt so I had a little try... The game is just absolutely filthy, a little wear in places sure, but mainly just caked in dirt.


I will wait until I have some proper Novus to go at this with... but I have hope for how I can get it up, there is an amount of ball swirl, this is never going to be mint, so I will see what happens when I get some Novus on it. Will put an order into @pinballmania when he is back, in no rush really, just weighing up what is needed to be honest. Left the playfield like this, so all in all a good fun day with it.

I think you are actually starting to enjoy this pinball repair thing, careful or you will end up like me, i spend 90% of my pinball time tinkering not playing.
Use the ISO with caution as it will dissolve most paint and finish on the playfield if over used. I prefer using naphtha as it will dissolve wax and grease but not touch the paint or protective lacquer. I get the big tins of 'panel wipe' used in the auto trade. Or if you are going to put an order in get the foam cleaner that many on here rave about.
The flipper issue could be caused by the EOS switch and the coil being wired up incorrectly as well as the diode, compare it to the working one.
Regarding the issue with mechs not seeming to have any life it sounds like the the live line that runs round all the mechanisms has broken somewhere. You are in a perfect position to fix this with the playfield out. Leave the side rails on the playfield, flip it over and prop it up to protect the protruding mechs and go to work with the meter and buzz it all out.
The great thing about these machines is you can almost get each section, playfield, base box, back box, all tidy and working independently before bringing them together.
Keep up the sterling work.
I think you are actually starting to enjoy this pinball repair thing, careful or you will end up like me, i spend 90% of my pinball time tinkering not playing.
I am already looking at another project that is on eBay sub £100 EM at the moment, I must be crazy, but with all of the help that I am getting on the forum, I am confident I can get something done.
Or if you are going to put an order in get the foam cleaner that many on here rave about.
Would you recommend this over Novus 2 then for this application?
Regarding the issue with mechs not seeming to have any life it sounds like the the live line that runs round all the mechanisms has broken somewhere. You are in a perfect position to fix this with the playfield out. Leave the side rails on the playfield, flip it over and prop it up to protect the protruding mechs and go to work with the meter and buzz it all out.
Yea there is a live off I am sure both of the pop bumper, and drop targets where I have been messing around, this sounds like the issue to me, but I am confident to get it up and running to a playable standard. Not sure if there is any interest, but this might be one I end up selling on to fund a newer DMD game, or potentially become my pin I take to events... as I say, if there is interest from the community to have at such events.
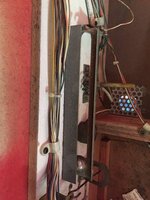
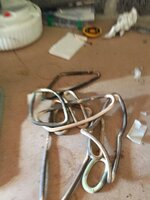
It's a lift tilt. The ball should be a smaller diameter then a regular pinball. If you lift the machine the ball should roll down and trigger the switch at the back.Sorry @Moonbus or anyone else who may know, but what is this random bit of the machine, it seems to have an immovable ball stuck in it and I have no idea what exactly it does...
Doesn't seem to connect anywhere, so am really stumped.
View attachment 59740
Intention is obviously to stop customers lifting the front of the machine.
Re. the r/h flippers - since this isn't a 'Dual Action Flipper' game (with two flippers on each side), the upper right flipper is switched from the lower one, so neither will work if there's a problem with the lower.
Bear in mind, too, that these aren't the solid-state Fliptronic items as fitted to No Fear. All the current for the flipper solenoids passes through the End-of-Stroke switches, cabinet button switches and the contacts of the relay on the driver board.
Bear in mind, too, that these aren't the solid-state Fliptronic items as fitted to No Fear. All the current for the flipper solenoids passes through the End-of-Stroke switches, cabinet button switches and the contacts of the relay on the driver board.
'panel wipe'
Any idea where to get a reasonable quantity from a readily available shop, or am I asking too much?
Isn't there a "Millwax" product for older playfields?
2. your lift tilt mechanism - should be wired up to someting. If nothing else you can wire it to the wires on the other plumb bob tilt mechanism, as it's then going to trigger a tilt in the smae way as that one does. You might need to clean the small ball and the contact at the end to get a decent electrical contact
2. your lift tilt mechanism - should be wired up to someting. If nothing else you can wire it to the wires on the other plumb bob tilt mechanism, as it's then going to trigger a tilt in the smae way as that one does. You might need to clean the small ball and the contact at the end to get a decent electrical contact
Naphtha related product... hopefully ok...
are you planning on cremating your pin?
Sent from my iPhone using Tapatalk
Thats all i used first time round.Naphtha related product... hopefully ok...
Its only to break down old wax and grease, it may even get rid of some of those ball marks on the chest area. Follow it up with something like the Millwax and then wax the PF.
Panel Wipe - Degreaser I use is here. If spend some time internetting you may be able to find somewhere local to you that you can get this or similar for near £10..
http://www.u-pol.com/us/en/product/system-20/coatings/degreasers/solvent-based-degreaser
http://www.u-pol.com/us/en/product/system-20/coatings/degreasers/solvent-based-degreaser
Fwiw this is my general plan for an EM pf, which doesn't include any touch-ups, insert leveling etc.
- Soft brush, vacuum, dust up as much up as poss
- Clean with Naptha
- If ingrained crud or swirls you can't live with Very Gentle application of IPA + ME - if you see paint on the rag stop
- Naptha wipe down
- Novus 2 polish
- Carnuba Wax, Gertitz etc.
- Custom Lexar overlay overkill
Great advice @astyy - really appreciate it, I will be getting the ME on it too I think but it’s certainly coming up with a bit of elbow grease.
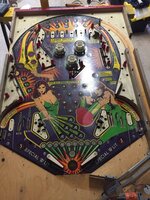
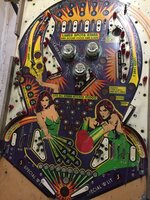
It’s still not clean by any stretch but I’m going to treat that as the precursor to stage 1 of Astyys suggested action.
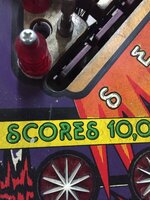
Not sure what to do with the following areas, think that I have three options really,
1. Leave as is, and continue on the process.
2. ME and ISO out the ball swirl and then get a local person with artist abities to fill hand brush in these areas (is that the right method, if so, any suggestions on paint to use?)
3. Send off to a forum member for full rework of play field (not sure on costs but imagine for the machine this will Ben prohibitive, it’s a Laser Ball, not a MB)
As always, any thoughts?
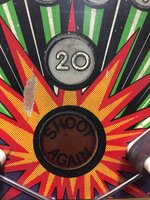
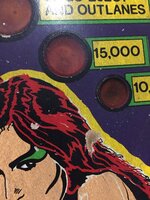


Last edited:
I would carry on as you put it back together and get a few games on it before investing to much time in the playfield.
The game may not click with any of you and if you decide to move it on you won't feel like you have invested to much in it.
The game may not click with any of you and if you decide to move it on you won't feel like you have invested to much in it.
I agree with moonbus, keep going all the while you're enjoying it then get back playing it. Don't skin tones show the ball swirls worse, reminds me of the hairy legs on Future Spa
Re. ME if you haven't used it before this video shows how slow and careful you take it, all 22 minutes of it
Re. ME if you haven't used it before this video shows how slow and careful you take it, all 22 minutes of it

