What's new
Pinball info

Register a free account today to become a member! Once signed in, you'll be able to participate on this site by adding your own topics and posts, as well as connect with other members through your own private inbox!

Complete Johnny Mnemonic re-decal etc

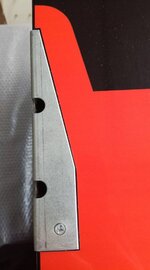
To repair cracked ramps I make shaped brackets from stainless steel and bolt them on securely, Theu not only hide the cracks but make it super strong

Sounds like a better idea if you have the skills and equipment.
 
All you need is a vice, hacksaw, drill and some files. I usually make a template with some thin cardboard to minimize cutting
 
Some priming done, which has highlighted the need for some more tiny bits of filler

Looking good insx. I'm just starting off with restoration on my Data East Star Wars. What wood filler are you using on yours mate? I have some of the rock hard Ronseal stuff in (pea size ball of hardener and golf ball sized filler) but I find that a pain to mix and sculpt. I also have some ready mixed stuff but that doesn't tend to set very well and can even start dropping out the holes when sanded!

Cheers

Andy
 
What wood filler are you using on yours mate? I have some of the rock hard Ronseal stuff in (pea size ball of hardener and golf ball sized filler) but I find that a pain to mix and sculpt.

Hi Andy. It sounds like we are using the same Ronseal stuff. I'm finding it OK now that I've learned how much hardener to use, that you only have a few minutes to work with it and to not mess around with it but just leave it well proud and sand afterwards. I would not want to use anything softer.
 
Hi Andy. It sounds like we are using the same Ronseal stuff. I'm finding it OK now that I've learned how much hardener to use, that you only have a few minutes to work with it and to not mess around with it but just leave it well proud and sand afterwards. I would not want to use anything softer.

And to mix in a well ventilated room or get as high as a kite!
 
Hi Andy. It sounds like we are using the same Ronseal stuff. I'm finding it OK now that I've learned how much hardener to use, that you only have a few minutes to work with it and to not mess around with it but just leave it well proud and sand afterwards. I would not want to use anything softer.

Cheers. Had a day on the stuff today. Think I finally got the mixture right though still crap at sculpting the stuff even with the “leave well proud” method
 
Think I bought the same sander yesterday - and can confirm it does a cracking job on Data East artwork too!

It looks like you have a rectangular one, as opposed to my round one. I guess they do much the same job.
 
Presumably you applied with a felt squeege? Seen some complete vinyl wrapping toolkits on EBay around £15 - £20 that look just the job - anti-static gloves felt squeege, craft knife etc.
 
Presumably you applied with a felt squeege? Seen some complete vinyl wrapping toolkits on EBay around £15 - £20 that look just the job - anti-static gloves felt squeege, craft knife etc.

Yes, a felt squeegee that cost me a couple of quid. I bought a decent craft knife from Amazon and some spare blades. Change blades often!
 
Really nice job that, looks so much better then before :thumbs:
Did you remove the decal where the leg plates are fitted ?
 
Do you trim the decals right to the edge of the cab or a few mil in from the edge all round (looks like the latter)?
 
A bit of both, actually. I ran a knife along a steel rule for most of them but for the bottom, I ran my knife blade along the cabinet edge at an angle.
 
A quick once over on the coin door with the same Simoniz Satin Black that I used on the cabinet.

IMG_20180306_160020 (Small).jpg
 
Not much to report, I'm just doing the last bits of decorating in the man cave before I can move in my JM kit and put it back together.

Here's the decal cut around the cabinet protector

IMG_20180320_151019 (Medium).jpg


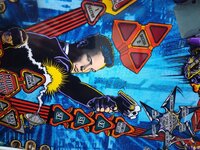
I've filled a divot near Johnny's head with super glue and given the playfield a clean and wax

IMG_20180320_150755 (Medium).jpg


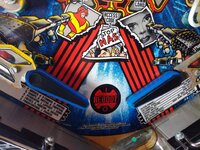
And I thought some nice new blue bands would go well with the black flipper bats that had already been fitted when I got the machine

IMG_20180320_150932 (Medium).jpg
 
Sideblades installed today and I've started to take the game home in bits for reassembly.

Serious overkill on the clamps, but it's what I had at hand.

IMG_20180329_123619_1 (Medium).jpg


IMG_20180329_124334 (Medium).jpg
 
Back
Top Bottom