Thanks, Will do.Done a bit of googling and acrylic is too brittle, you want 3mm polycarbonate or lexan
Pinball info
You are using an out of date browser. It may not display this or other websites correctly.
You should upgrade or use an alternative browser.
You should upgrade or use an alternative browser.
Complete Baby Doll - Segasa EM
- Thread starter AlanJ
- Start date
Big thanks to @astyy for the suggestion I seek out a hackspace, and then to all the guys at Leeds Hackspace (https://leedshackspace.org.uk/). Especially Flig (he says hi to @Big Phil btw) and Jo who produced this for me last night in a couple of hours, using their laser cutter:
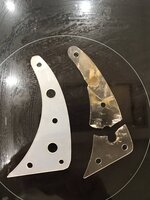
The time was all in mapping the image, they took a photo and then used inkspace to draw the outline and the holes. A few test prints on thin wood and some adjustments and we were in business. The laser cutter didnt like my polycarbonate sheet it just burnt and discouloured, so we used some flexible opaque acrylic instead.
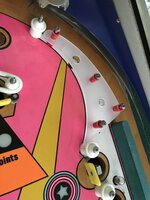
Perfect fit!
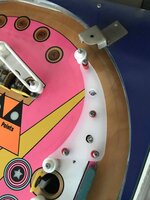
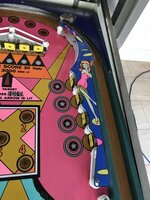

The time was all in mapping the image, they took a photo and then used inkspace to draw the outline and the holes. A few test prints on thin wood and some adjustments and we were in business. The laser cutter didnt like my polycarbonate sheet it just burnt and discouloured, so we used some flexible opaque acrylic instead.

Perfect fit!


Nice one @AlanJ, this prompted me to check and my local makerspace has literally just moved into it's own workshop which I plan to visit very soon. They're interested in my pinball projects (they're mainly building Daleks!) and first off I'd like to cut some protectors and maybe work on complete pf overlays.
That's great news. I was really impressed by the guys at the Leeds Hackspace, they were so friendly and tons of different skills. One of the guys was into pinballs and had been involved in the retro gaming scene for many years so had helped set up some of the shows including pinballs in the past.Nice one @AlanJ, this prompted me to check and my local makerspace has literally just moved into it's own workshop which I plan to visit very soon. They're interested in my pinball projects (they're mainly building Daleks!) and first off I'd like to cut some protectors and maybe work on complete pf overlays.
Anyhow I joined their chat group today (using Slack - all new to me, but I think I've got the hang of it). Anyhow the chatter today was all about pinball so I've planted a seed - they fancy a group project - and of course pinball has it all - woodworking, metal work, electrics, electronics, programming, art work, etc, etc. I've offered to fund a donor pin if I can find a project one. Would really like it to be EM, as I think it would be cool to retrofit an EM with modern electronics whilst at the same time keeping the EM bit working too. 2 games in one!
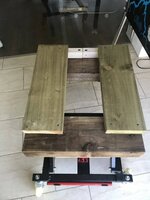
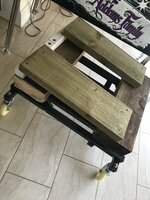
Got a bit distracted today on the EM project - decided to screw together the various bits of wood I've been using with my pool table lifter to move my pins about. I was sick of the wood moving around, so a bit of time and now it's all steady and works a treat. I used it to lift each pin today and place 'Castor Cups' under each foot as I have Karndean flooring and the feet are digging in a bit. 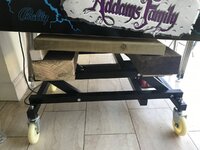


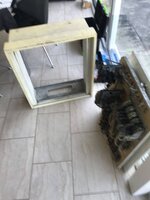
Taken the head off the baby Doll today - the backbox is scruffy and needs a sand down and repaint. I'm not looking to refurb this to as new, just clean & tidy it up. The white has faded to an off-white over the years, so I've matched to a magnolia type gloss. Only issue is some parts of the cabinet have darkened more than others. But at least it will look better than brilliant white. Next job is to sand and prime, then gloss.
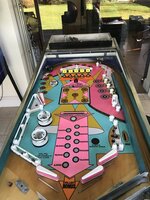


So, whilst waiting for the backbox to dry, I cracked on and had a go at the 'coke and tin foil' method fo the legs - suggested my @pinballmania :
Before:
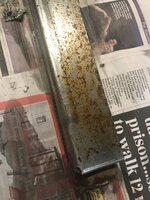
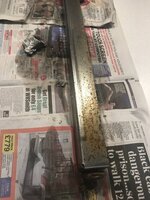
And then after:
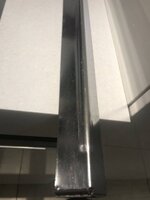
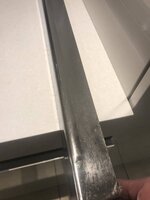
By no means perfect, but a HUGE improvement. Thank you for the tip Andy.
Before:


And then after:


By no means perfect, but a HUGE improvement. Thank you for the tip Andy.
Today I replaced more lampholders and also cleaned the bonus stepper unit (repost as forum issues lost this from earlier)
Put in some flat uni direction SMD lights - they are just the thing.
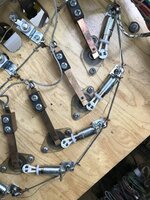
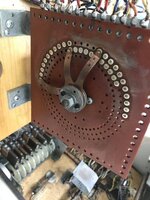
Didn't clean too much muck off - can always do more, but I took it easy.
Anyhow, machine re-asembled and a test game played sucessfully.
Still got more bulb holders to replace and quite a few other things to do and also the cabinet outside needs looking at.
Put in some flat uni direction SMD lights - they are just the thing.


Didn't clean too much muck off - can always do more, but I took it easy.
Anyhow, machine re-asembled and a test game played sucessfully.
Still got more bulb holders to replace and quite a few other things to do and also the cabinet outside needs looking at.
I've almost finished this project, the game is working properly, all the features work fully now, and all bulbs work and have been upgraded to LED's. Playfield cleaned up really nicely and have re-rubbered. Replaced / repaired playfield plastics that were broken.
The only things I really have left are to source some better flipper buttons, and sort out the cabinet paintwork sometime......In the meantime, I'm enjoying playing this game. Quite tough to get the EB
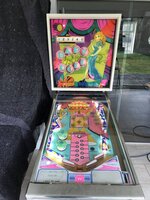
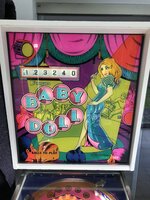
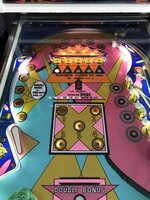
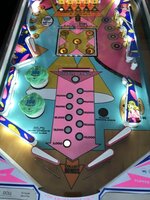
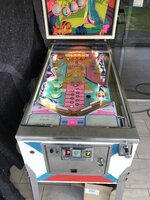
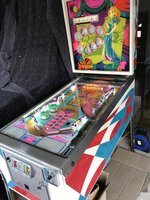
The only things I really have left are to source some better flipper buttons, and sort out the cabinet paintwork sometime......In the meantime, I'm enjoying playing this game. Quite tough to get the EB


Btw, costs: Machine cost me £410 on ebay. Shipping to Leeds £212, Parts £413 = Grand Total £1,035

 Spanish and Italian games always seem to clean up well