What's new
Pinball info

Register a free account today to become a member! Once signed in, you'll be able to participate on this site by adding your own topics and posts, as well as connect with other members through your own private inbox!

In Progress AFM resto / repair

Kilgore

Registered
Joined
Sep 29, 2012
Messages
116
Alias
Dave
Hi all,

I've only just stumbled across this part of the site, i'm a little way into the refurb of my AFM that i bought a few weeks ago.

I have never undertaken any kind of resto on a pin whatsoever, i have very limited knowledge of electrics and have only recently learnt to solder :D

In a frantic moment of clarity i saw a machine id never likely be able to afford usually listed here for cheap ( ish ) monies and made the plunge.

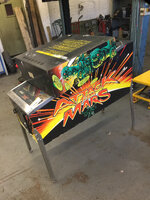
Sold as working but in need of a lot of love. I had grand plans of a full playfield swap and complete super minty resto. Subsequently my plans have changed a little but ill let the pics do some of the explaining. Please excuse my ignorance and lack of knowledge with most things technical with regard to pinball....

collection

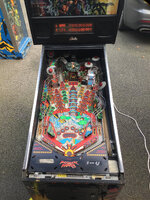
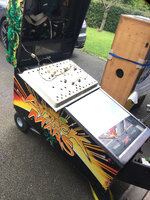
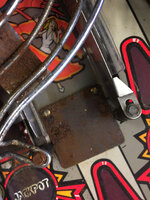
in all honesty i was expecting far worse, first impressions were good, playfield wear as described, cabinet better than i had predicted and the game fired up and played. speakers sound shot, a large portion of the GI and inserts lights weren't working, the motorbank barely moved and lots of rusty metal everywhere
farm5.staticflickr.com_4568_26460073719_638dc369fe_k.jpg

cab faded this side but not horrendous
farm5.staticflickr.com_4512_37525106764_8d0983ee56_k.jpg

farm5.staticflickr.com_4468_38181385986_67f3fc3973_k.jpg

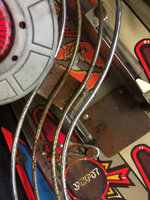
I thought id just start by cleaning the best i can, see whats actually broken and make a list of bits that are missing, faulty or rusty as hell!
farm5.staticflickr.com_4534_38204776302_9b9aaf1383_k.jpg

farm5.staticflickr.com_4551_38204776342_92ec7df7ae_k.jpg

farm5.staticflickr.com_4456_37525563894_f64838ddbf_k.jpg

farm5.staticflickr.com_4566_38251350481_4935ce1c3c_k.jpg

farm5.staticflickr.com_4537_38806016912_67b146c5d6_k.jpg

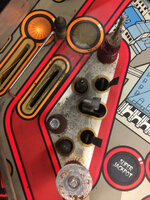
well my first minor triumph was that the GI is actually working is just turns out all the bulbs were blown or so filthy you couldn't make out they were on :D
farm5.staticflickr.com_4499_38181837166_285ce08b6a_k.jpg

farm5.staticflickr.com_4585_37525597034_cc95552efd_k.jpg

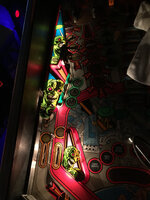
This is just after i have cleaned those two bits and replaced bulbs
farm5.staticflickr.com_4549_24380373138_04bcd3d326_k.jpg

you can see here the extent of the non existent GI or much in the way of insert for that matter :D
farm5.staticflickr.com_4538_38251338221_0ff853afc1_z.jpg


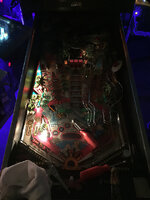
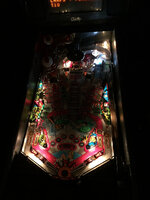
Carried on the through and cleaned all the plastics and replaced every bulb as i went in the GI. Made a massive difference and was feeling well pleased with myself! Simple job but satisfying.
farm5.staticflickr.com_4531_38121016494_1be4fb929f_k.jpg

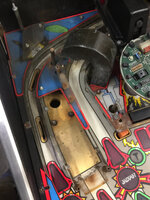
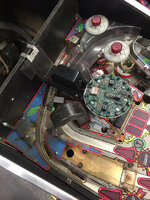
None of the top of the playfield GI was working so decided to strip that down too so i could see what was going on
farm5.staticflickr.com_4545_38121002514_10c22f5379_k.jpg

farm5.staticflickr.com_4523_38121003554_5dc9935427_z.jpg

farm5.staticflickr.com_4529_37950125265_a2292af5c9_k.jpg[/url]

so filthy everywhere

farm5.staticflickr.com_4535_37950134635_45e5ca5418_k.jpg

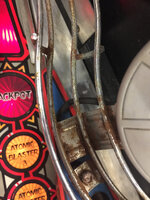
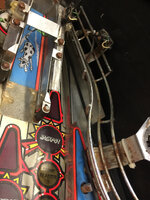
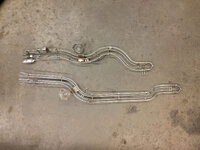
I am going to have to replay the wire forms or get them re chromed but i thought id have a little go and seeing if i could clean them up. A bit of autosol and lots of rubbing and the one has cleaned up much better than i had expected.

not sure you can fully make it out but the bottom one in the pic is the cleaned one
farm5.staticflickr.com_4570_23971682717_4f34633ad7_k.jpg
 
turned my attention to the underside and the inserts....

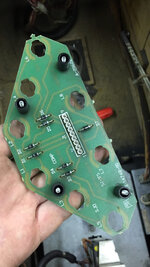
This may explain the lack of illumination

farm5.staticflickr.com_4572_37540738434_538d618fba_k.jpg

weirdly satisfying to wash filthy PCB's

farm5.staticflickr.com_4565_38219938622_aebd0bbcf0_k.jpg

i put new bulbs in and popped it back in

result we have light!!

farm5.staticflickr.com_4465_38196900006_51f30f2137_k.jpg

i was so pleased that it lit up i hadnt bothered to clean the inserts themselves....

quick wipe of the finger told me i better had

farm5.staticflickr.com_4529_38219935042_d50727ee93_k.jpg

what a difference

farm5.staticflickr.com_4565_38196902186_4c1cd06dfe_k.jpg

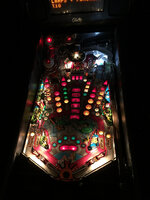
Fast forward and having washed all the underplayfield pcbs, fully dried them and replaced all the bulbs. AFM started to look like a pin again. felt great!

farm5.staticflickr.com_4544_38121017074_618b54310d_k.jpg
 
Next on the list is to swap out both the ramps which are cracked and filthy. Nick kindly gave me some spares all of which appear to be original in varying states of repair. Ive ordered a tonne of new screws, posts, washers and screws. A manual, replacement up kickers and @Monkeyboypaul has been extremely helpful and supplied me with loads of bits missing or broken from his old resto. Cant thank him enough for his generosity! Those bits are on their way to me now. Ill post up some pics when they get here.

As i originally said i had planned to do a full playfield swap but having started to strip it down i think for the moment im going to do my best to make it a great players game. I will perhaps inthe furture do a complete swap out but right now i dont think it needs it. The playfield wear by the kick out is pretty bad but as long as it doesn't effect game play then i dont see the urgent need to fix it. I have bought and overlay for it so will see how that goes. Waiting on the parts from Paul to rebuild the upper playfield. Will update with more pics when there is a little more to show.

I did managed to trace the the faulty upper GI to a bodged wiring job to the board. Nick gave me a replacement edge connector so will give that a go next time im at the unit.

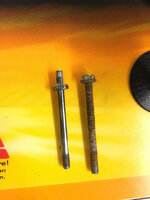
whilst impatiently waiting for the new screws and posts to arrive i had a go at cleaning the rusty ones with a wire wheel. They have come up great.

farm5.staticflickr.com_4518_38251363441_4c4588d52f_z.jpg

Ive borrowed a tumbler from my girlfriends dad so going to give that a go too. I watched matt adams youtube resto so on his advice ordered some corn media
 
This is brill!
I really like it when people just get stuck in, must get back in the garage!
Looking forward to following this keep the pictures coming
 
Last edited:
This is brill!
I really like it when people just get stuck in, must get back on the garage!
Looking forward to following this keep the pictures coming

Thanks Tony i appreciate the kind comments!

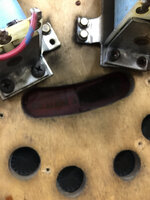
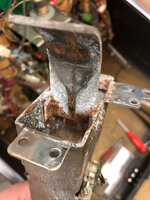
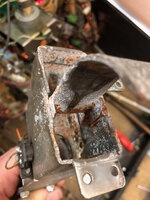
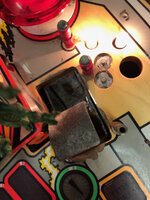
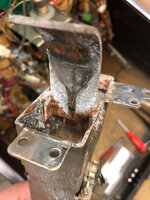
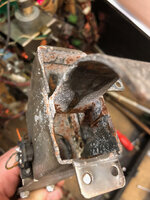
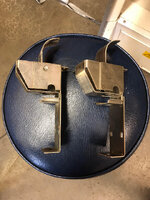
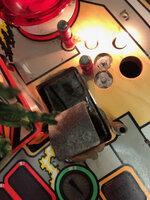
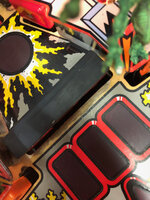
Had a brief few minutes in the unit yesterday so had a little tinker. Removed the right up kicker scoop thing. whats the correct name for this piece?

farm5.staticflickr.com_4571_38870016391_26a4a14000_k.jpg

farm5.staticflickr.com_4521_38870016321_2982e64088_k.jpg

Despite the water damage and rust It is essentially in fully serviceable condition. I will blast it and then get it powder coated. Had i have examined this prior to ordering a new one i perhaps would have held off buying new.
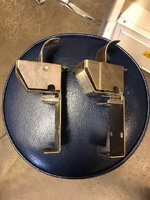
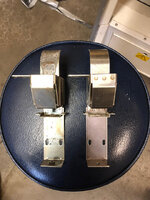
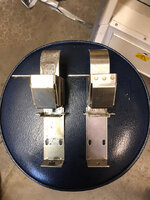
I bought the 'new improved version' and ill be honest i cant see any difference between the original and the replacement? Anybody know whats actually new and improved?

farm5.staticflickr.com_4571_24005113967_0be23233ca_z.jpg

farm5.staticflickr.com_4583_24998510158_efcd6885c9_z.jpg

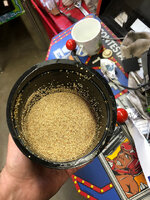
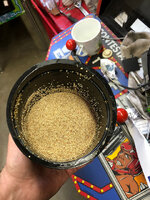
and in other news my corn media arrived for the borrowed tumbler. Ive put some super nasty old balls in to see how they come out.....

farm5.staticflickr.com_4577_38154485704_3f63fde65e_z.jpg

I took the motor bank assembly apart to test the motor and it now no longer goes up or down at all. After a little fiddle with the meter im not getting any power at the driver board under the playfield. After a quick google i found that thats powered by transistor number 39 which i have no idea how to test but assuming thats dead. I have the part number from the manual so have ordered a couple. Will be attempting my first board repair shortly then :) Motor tested on a 12 volt car battery and worked absolutely fine. Gave it a good clean and checked over the roller switches on the assembly too. I got distracted so no photos on that bit sorry!

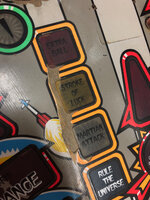
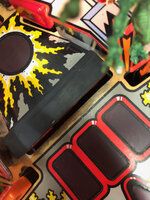
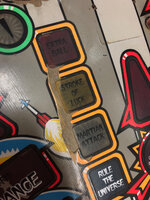
I realised i hadn't posted any pics of the playfield wear earlier so for future reference here are the worst bits of wear

This in my opinion looks way worse in the pic than in real life

farm5.staticflickr.com_4535_38839701462_4cc733e9cb_k.jpg

farm5.staticflickr.com_4520_24998509538_ca4953bf4e_k.jpg

farm5.staticflickr.com_4530_38839702112_192b12f806_k.jpg

farm5.staticflickr.com_4585_24005113667_65227f454b_k.jpg
 
so prior to all the snow kicking in i received the parcel from @Monkeyboypaul :clap::clap::clap:

farm5.staticflickr.com_4687_27224040729_4f23824927_k.jpg

excited to get that lot cleaned up and on!

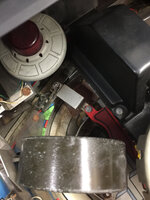
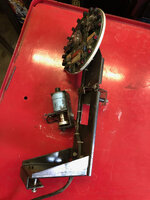
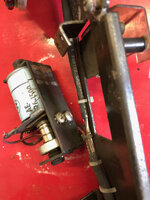
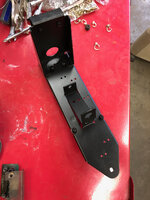
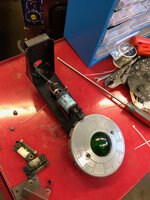
Decided to take a look at the mother ship assembly as it has a broken bracket.

farm5.staticflickr.com_4575_38285409934_ea438afd87_k.jpg

should be an easy fix

farm5.staticflickr.com_4642_38964848772_6d331bc600_k.jpg

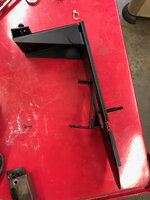
stripped it all down, re welded the bracket back on, primered it and painted it satin black

farm5.staticflickr.com_4726_24137308997_23b317571f_k.jpg

farm5.staticflickr.com_4558_25130769998_283708fe8a_k.jpg

All reassembled whilst i try and figure out why the strobe isnt working.

farm5.staticflickr.com_4736_38964851632_61102cee18_k.jpg[/url]

i have a replacement unit complete with pcb from paul as well as a new bulb. Can anyone tell me should the strobe flash during the standard flasher bulb test?
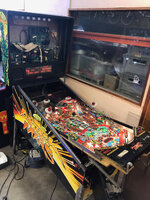
 
The strobe is a separate test in the menu, driven by a little strobe PCB behind the backboard - should be encased in metal with warning stickers on it (that’s what the spare bits were for!). @cooldan recently avoided death & fixed his Strobe board.
The triple white cable connects the strobe bulb to the strobe PCB.
 
Thanks Tony i appreciate the kind comments!

Had a brief few minutes in the unit yesterday so had a little tinker. Removed the right up kicker scoop thing. whats the correct name for this piece?

farm5.staticflickr.com_4571_38870016391_26a4a14000_k.jpg

farm5.staticflickr.com_4521_38870016321_2982e64088_k.jpg

Despite the water damage and rust It is essentially in fully serviceable condition. I will blast it and then get it powder coated. Had i have examined this prior to ordering a new one i perhaps would have held off buying new.
I bought the 'new improved version' and ill be honest i cant see any difference between the original and the replacement? Anybody know whats actually new and improved?

farm5.staticflickr.com_4571_24005113967_0be23233ca_z.jpg

farm5.staticflickr.com_4583_24998510158_efcd6885c9_z.jpg

and in other news my corn media arrived for the borrowed tumbler. Ive put some super nasty old balls in to see how they come out.....

farm5.staticflickr.com_4577_38154485704_3f63fde65e_z.jpg

I took the motor bank assembly apart to test the motor and it now no longer goes up or down at all. After a little fiddle with the meter im not getting any power at the driver board under the playfield. After a quick google i found that thats powered by transistor number 39 which i have no idea how to test but assuming thats dead. I have the part number from the manual so have ordered a couple. Will be attempting my first board repair shortly then :) Motor tested on a 12 volt car battery and worked absolutely fine. Gave it a good clean and checked over the roller switches on the assembly too. I got distracted so no photos on that bit sorry!

I realised i hadn't posted any pics of the playfield wear earlier so for future reference here are the worst bits of wear

This in my opinion looks way worse in the pic than in real life

farm5.staticflickr.com_4535_38839701462_4cc733e9cb_k.jpg

farm5.staticflickr.com_4520_24998509538_ca4953bf4e_k.jpg

farm5.staticflickr.com_4530_38839702112_192b12f806_k.jpg

farm5.staticflickr.com_4585_24005113667_65227f454b_k.jpg

Enjoying this...

Worth tapping-up a playfield restorer while it’s stripped and see what they would charge?

Not sure if AFM is a pre-diamondcoat (clearcoated) playfield. If it is late enough to be diamond/clearcoated, you could otherwise have a go at shoring up the surface with a can of cc and feathered masking if you are feeling brave.

You can fill sunken inserts by pipetting water-thin superglue so if that area is sunk from the surface lifting, some Cc, then pipetted glue to get it level, and then more CC might work. A rub with some wire wool and then some novus 3 and novus 2 afterwards would help blend the surfaces. You could go nuts and touch up the paint yourself too but I’m not that brave yet!

Full info here: http://www.flippers.be/shop_pinball_machine_3.html

Great thread so far :)

Careful with this method superglue can cloud
 
Thanks for all the kind comments and input guys. I have been slacking of late as i'm also restoring an old car at the same time and my time is being stretched thinly across both hobbies.

I haven't dont a great deal since Christmas. I got stumped by trying to sort the strobe, whatever i did i couldn't figure it out. Fast forward a few weeks and i cheated and called in the expert. Andy from pinball mania. He fixes all my games when they break and kindly agreed to come take a look at a couple of the issues i cant suss out.

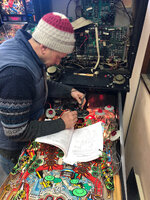
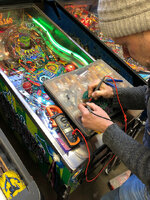
here he is trying to explain to my simple mind how a logic probe works. Somehow i've managed to fry every led on the saucer pcb

farm5.staticflickr.com_4758_25628231467_cf94ca6c0e_k.jpg

I didn't take too many snaps but basically hes fixed the strobe, the motor bank, a load of burnt connectors on the board, crappy sound ( a magic fix apparently fairly common on AFM by cutting off a couple of capacitors??! random but worked a treat ) and sorting out some missing strings of GI lighting for the back box.

farm5.staticflickr.com_4747_38688655630_5d28555b66_k.jpg

farm5.staticflickr.com_4622_38688654030_30c8cb656c_k.jpg

farm5.staticflickr.com_4617_40499045431_76c9bfa8bf_z.jpg

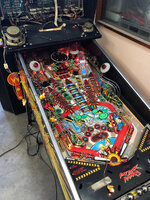
Overall i'm super chuffed it is now 95% fully playable. I have some posts on order, rebuild of the flippers to do and re-secure some of the plastics and ramps and we are pretty much good to go.

I have also decided i will probably do a full playfield swap. I think getting it all fully working has been a great exercise in familiarising myself with the game and provided a good base of knowledge to do the swap.

So when the credit card allows i shall get a new playfield ordered and swap it out.

Im itching to get it playing so hopefully shouldn't be such a long time between updates.
 
Back
Top Bottom